
Learn How to Install Invoke: Stable Diffusion Creative AI for Professionals and Enthusiasts
Invoke is a professional creative AI tool for visual media, based on the Stable Diffusion technology. Stable Diffusion is a state-of-the-art method for generating realistic and diverse images from text or other images. Invoke allows you to use Stable Diffusion models in a simple and intuitive way, through a web-based user interface (WebUI), a command-line interface (CLI), or a commercial cloud service. Invoke is different from other Stable Diffusion GUIs, such as ComfyUI and Automatic1111, in several ways. First, Invoke is the only tool that supports both the open source and the commercial versions of Stable Diffusion.
You can install Invoke locally on your PC if you have the right hardware, or you can sign up to the commercial version for a monthly fee that allows you access to their cloud GPU, which includes a workflow builder. Second, Invoke is designed to be fast, stable, and user-friendly. It has a sleek and modern WebUI that lets you generate images with a few clicks, a CLI that gives you more control and flexibility, and a cloud service that offers high performance and reliability.
Third, Invoke is constantly updated with the latest features and models from the Stable Diffusion research community. You can use Invoke to create stunning visual media with various modes and settings, such as text to image, image to image, outpainting, inpainting, color sketch, prompt matrix, and more.
In this tutorial, you will learn how to install Invoke for Stable Diffusion on Microsoft Windows, and how to use it to generate amazing images from your own prompts. Let’s get started!
Table of Contents
Invoke is a powerful and versatile tool for using Stable Diffusion, a generative AI technology that can create realistic and diverse images from text or other images. Invoke has many benefits that make it stand out from other Stable Diffusion GUIs, such as ComfyUI and Automatic1111. Here are some of the main benefits of Invoke:
Invoke can work with Stable Diffusion 1.x, 2.x, and XL models, as well as different types of models, such as checkpoint, safetensors, and diffusers. This gives you more options and flexibility to choose the best model for your needs and preferences.
Invoke has a modern and intuitive web UI that lets you generate images with a few clicks, without having to deal with complex commands or settings. You can also use the command-line interface (CLI) if you want more control and customization. The web UI is also responsive and adaptive, meaning it can adjust to different screen sizes and devices.
The Unified Canvas is a mode that allows you to do both inpainting and outpainting on the same image, using a seamless and interactive interface23. Inpainting is the process of filling in missing or damaged parts of an image, while outpainting is the process of extending the boundaries of an image. The Unified Canvas lets you do both tasks simultaneously, creating stunning and coherent compositions.
Invoke uses asynchronous processing and optimizations to speed up the image generation process, reducing the waiting time and improving the performance. Invoke also ensures the stability and quality of the image results, avoiding common issues such as artifacts, glitches, or distortions.
Invoke allows you to design and save your own workflows using a modular graph interface, where you can connect different nodes and settings to create complex and customized image generation pipelines. Invoke also lets you save and load your previous models, embeddings, and workflows as templates, making it easier to reuse and share your work. Additionally, Invoke has a gallery function that lets you quickly save and come back to your generated images, as well as export them in different formats.
Invoke supports different modes for image generation, such as text to image, image to image, outpainting, inpainting, color sketch, prompt matrix, and more. You can also adjust various settings for each mode, such as prompt, seed, sampler, face restoration, upscaling, nodes, textual inversion, and dream booth. These modes and settings allow you to create a wide range of images, from realistic to abstract, from simple to complex, from original to modified.
Invoke is constantly updated with the latest features and models from the Stable Diffusion research community, keeping up with the state-of-the-art developments and innovations in the field. You can always access the newest and best Stable Diffusion models and features with Invoke, and enjoy the benefits of cutting-edge generative AI technology.
Invoke is the only generative creation tool and custom AI model manager where you retain complete control & ownership of your work, your models, and your intellectual property, in perpetuity.
Before you start installing Invoke, you need to check if your system meets the following requirements. These requirements will help you install and run Invoke smoothly and efficiently:
Operating System:
You can use Invoke on Windows, MacOS, or Linux. However, you need to make sure that your operating system is updated to the latest version.
You need to have Python 3.10 or 3.11 installed on your machine. Earlier or later versions are not supported by Invoke. You can download and install Python from the official Python website.
Download Python 3.12.1Visual C++ Libraries
Windows users must install the free Visual C++ libraries from Microsoft
Download Microsoft Visual C++CUDA Tools
For those with NVidia GPUs, you will need to install the CUDA toolkit and optionally the XFormers library.
Node.js and pnpm:
You also need to have Node.js and pnpm installed on your machine. Node.js is a JavaScript runtime environment that is required for Invoke to work. pnpm is a package manager that is used to install the dependencies for Invoke. You can download and install Node.js from the official Node.js website. You can install pnpm with the command
npm install -g pnpmif needed.Hardware:
For the best performance, you need to have a system with a powerful GPU, at least 16 GB of RAM and a minimum of 6-8 GB VRAM for rendering 1024×1024 images. If you don’t have a GPU, you can use the CPU option, but it will be much slower and less stable. You can check the compatibility of your GPU with the CUDA support matrix for Nvidia cards or the ROCm support matrix for AMD cards.
Storage:
You need to have enough storage space on your computer to store the Invoke installation files, the models, and the generated images. The installation files are about 2 GB, the models are about 4 GB each, and the images can vary in size depending on the resolution and format. I recommend having at least a 1 TB drive for Invoke. These files are huge!!
Internet Connection:
You need to have a stable and fast internet connection for downloading the Invoke installer and the models. The installer is about 500 MB and the models are about 4 GB each. You also need an internet connection for accessing the Invoke web UI and the cloud service.
Repository – InvokeAI · GitHub
Release Invoke 3.6.2 · invoke-ai/InvokeAI · GitHub

The ability to train custom models has become a vital skill across various fields. As AI continues to integrate into creative and technical domains, data annotation and model training are set to become valuable skill sets and some of the most sought-after professions. Within the creative field, we often use diffusion training, but when it comes to open-source localization, we have several options to choose from: Dreambooth vs LoRA vs Textual Inversion vs Hypernetworks. It can be a bit confusing, so which one should you use?
Step 1: Download the Automatic Installer.
- Move the downloaded file to the folder you want to install Invoke.
- Extract the InvokeAI Installer.
Step 2: Verify Python Version
- Before you start the installer.
- Please open up your system’s command line window (Terminal or Command) and type the commands:
- python –version
- If all is well, it will print “Python 3.X.X”, where the version number is at least 3.10., and not higher than 3.11.
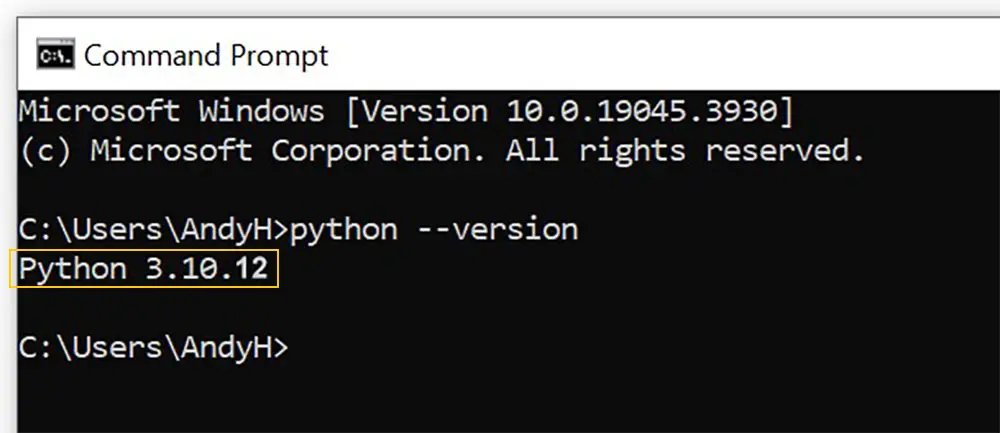
Step 3: Verify pip Version
- If the above works, check the version of the Python package manager, pip:
- In the Command Prompt, Type the commands: pip –version
- You should get a message that indicates that the pip package installer was derived from Python 3.10 or 3.11.
For example: “pip 22.0.1 from /usr/bin/pip (python 3.10)”

Step 4: Run Long Paths on Windows
- If you are on Windows, you will need to enable Windows Long Paths to run InvokeAI successfully.
If you’re not sure what this is, you almost certainly need to do this. - Simply double-click the “WinLongPathsEnabled.reg” file located in this directory, and approve the Windows warnings.
Note that you will need to have admin privileges in order to do this.


Step 5: Launch the installer.
- Windows: Double-click the ‘install.bat’ file
(while keeping it inside the InvokeAI-Installer folder). - Linux and Mac:
Please open the terminal application and run ‘./install.sh’
(while keeping it inside the InvokeAI-Installer folder).
The installer will create a directory of your choice and install the InvokeAI application within it. This directory contains everything you need to run
InvokeAI. Once InvokeAI is up and running, you may delete the InvokeAI-Installer folder at your convenience.
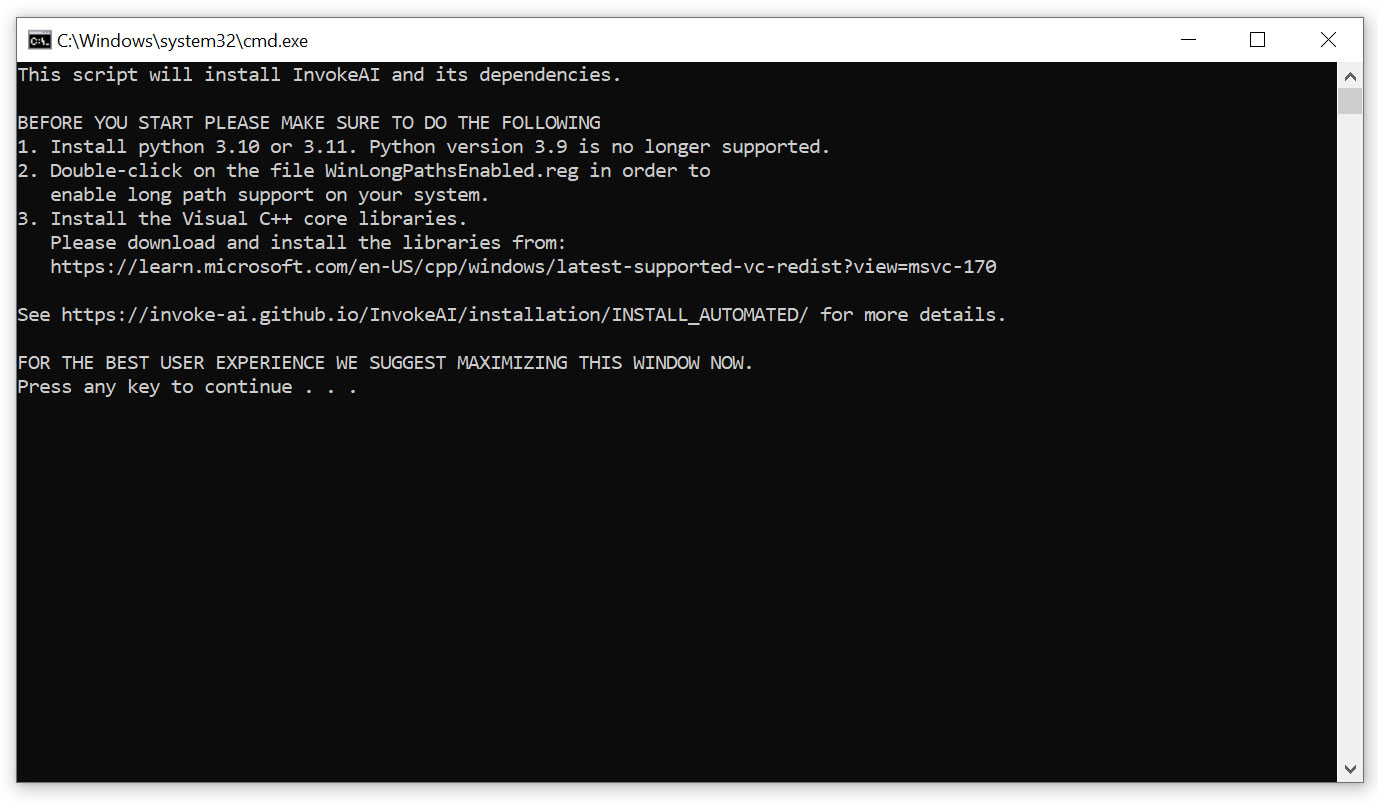
- This is first menu you will see when Launching the InvokeAI Installer.
- Maximize the window, then Press any key to continue.
Step 6: Follow the Installer’s Instructions.
Below, I will be highlighting the options that fit my PC. You will need to do the same.
InvokeAI will be installed in:
- C:\Users\AndyH\invokeai Use this location? [y/n]:
- (Select ‘n’ if you want to change directory)
Please select the type of GPU installed in your computer.
- an NVIDIA GPU (using CUDA™)
- an NVIDIA GPU (using CUDA™, and DirectML™ for ONNX) — ALPHA
- no compatible GPU, or specifically prefer to use the CPU
- I’m not sure what to choose
Dependencies will begin Downloading
- After selecting your GPU above, Invoke will begin downloading and installing the dependencies required.
(It may take awhile)
- After selecting your GPU above, Invoke will begin downloading and installing the dependencies required.
Root Directory and Configuration:
After libraries are installed, InvokeAI will set up its root directory and configuration. You can choose between:
- AUTOMATIC configuration: install reasonable defaults and a minimal set of starter models.
- MANUAL configuration: manually inspect and adjust configuration options and pick from a larger set of starter models.
- Select Automatic and it will pick the best settings for your platform/hardware.
Just set it and forget it; InvokeAI will choose the best settings for you unless you have a strange alien computer,
You can always change it later once you learn more about these features. It’s worth learning!
Launch Invoke AI!
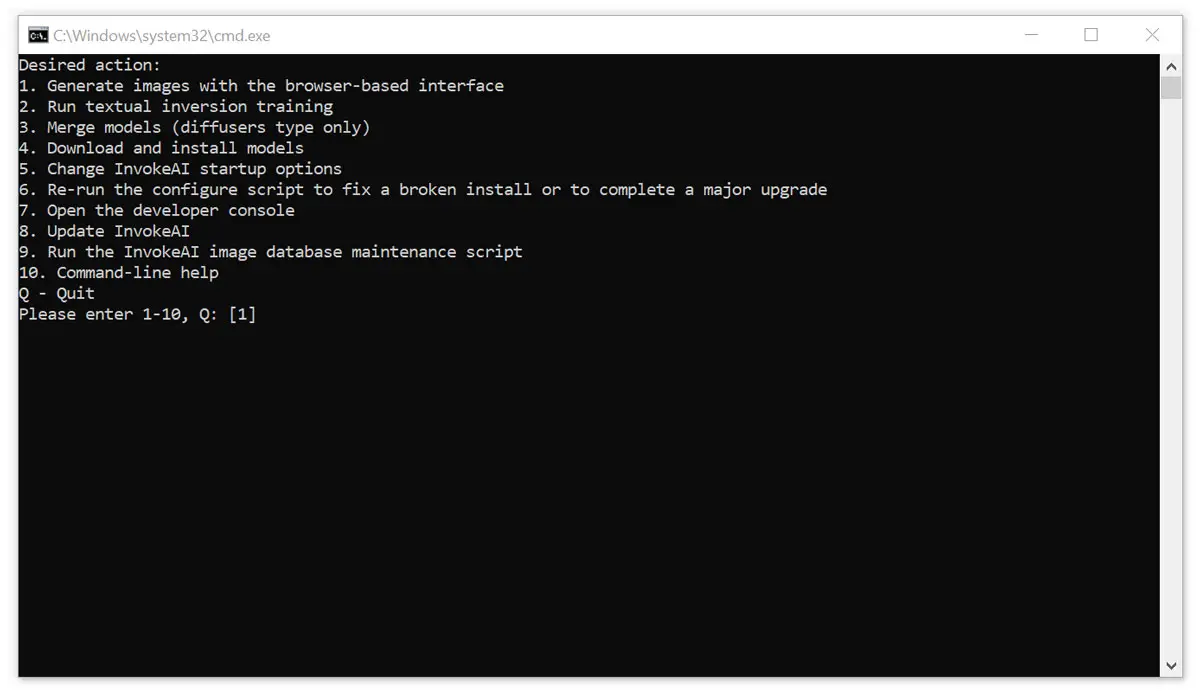
- Double click on the Invoke.bat (Windows Batch File) in the root directory to launch it.
- A ‘Desired action’ window will open.
- Select 1. Generate images with the browser-based interface.
- Copy and Paste the URL address you’re provided in your browser, to access the Invoke WebUI.
http://127.0.0.1:9090/
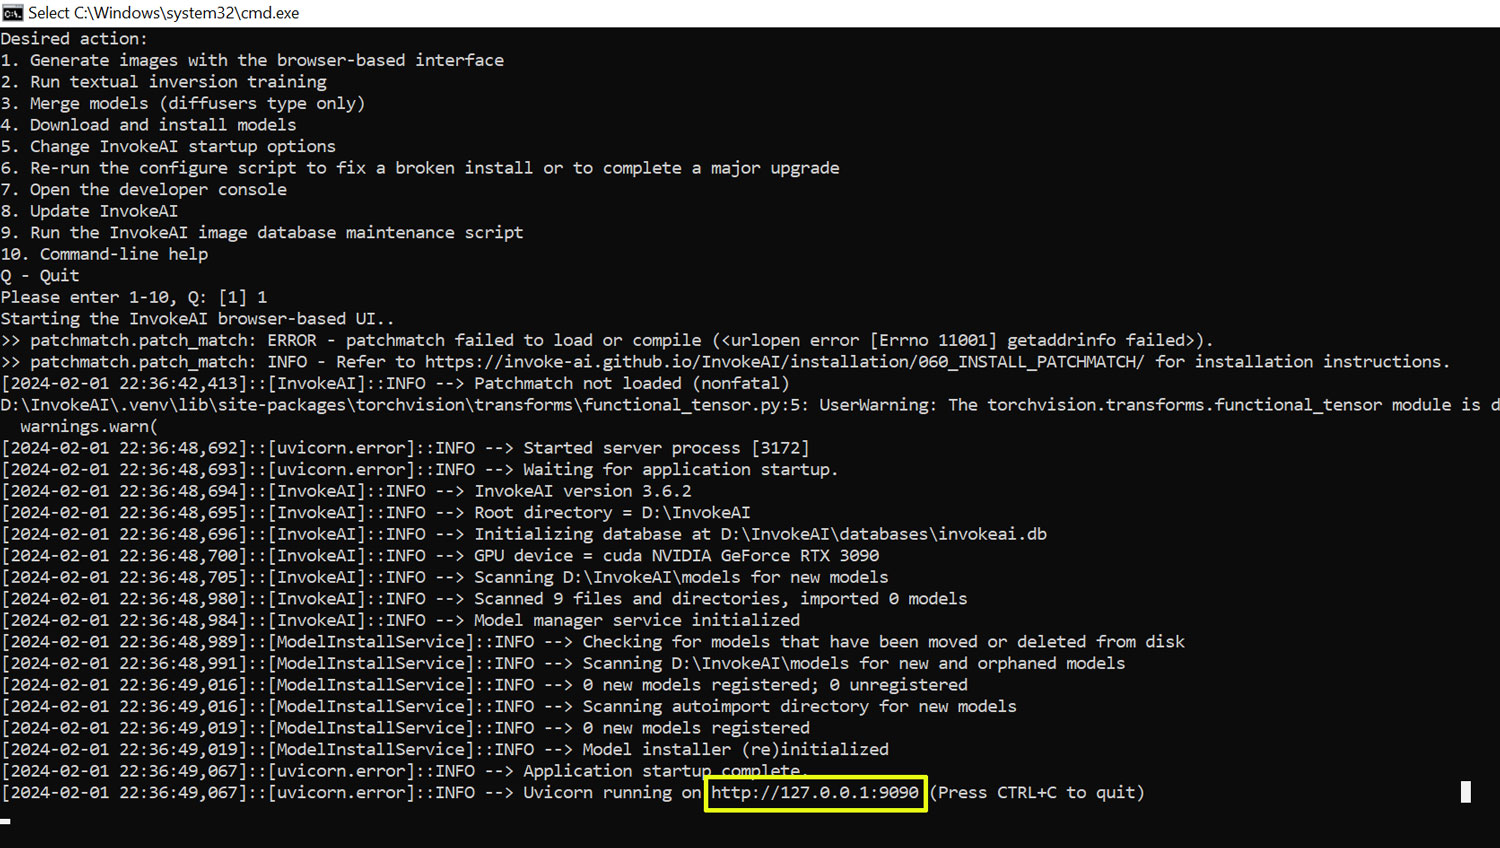
| Common Issue |
|---|
Ignore this message.“A matching Triton is not available, some optimizations will not be enabled.”There’s no Windows triton, and that warning does not mean anything is wrong. Triton is not supported on windows, and only xformers 0.0.15 and above uses it. This error can be ignored on windows and xformer will still work and likewise with Invoke. |
Launch the Invoke.bat (Windows Batch File)
Select Option 8. Update InvokeAI
Select your preferred update option.
[1] Update to the latest official release.
[2] Update to the latest pre-release (may be buggy, database backups are recommended before installation
[3] Manually enter the version you wish to update to.
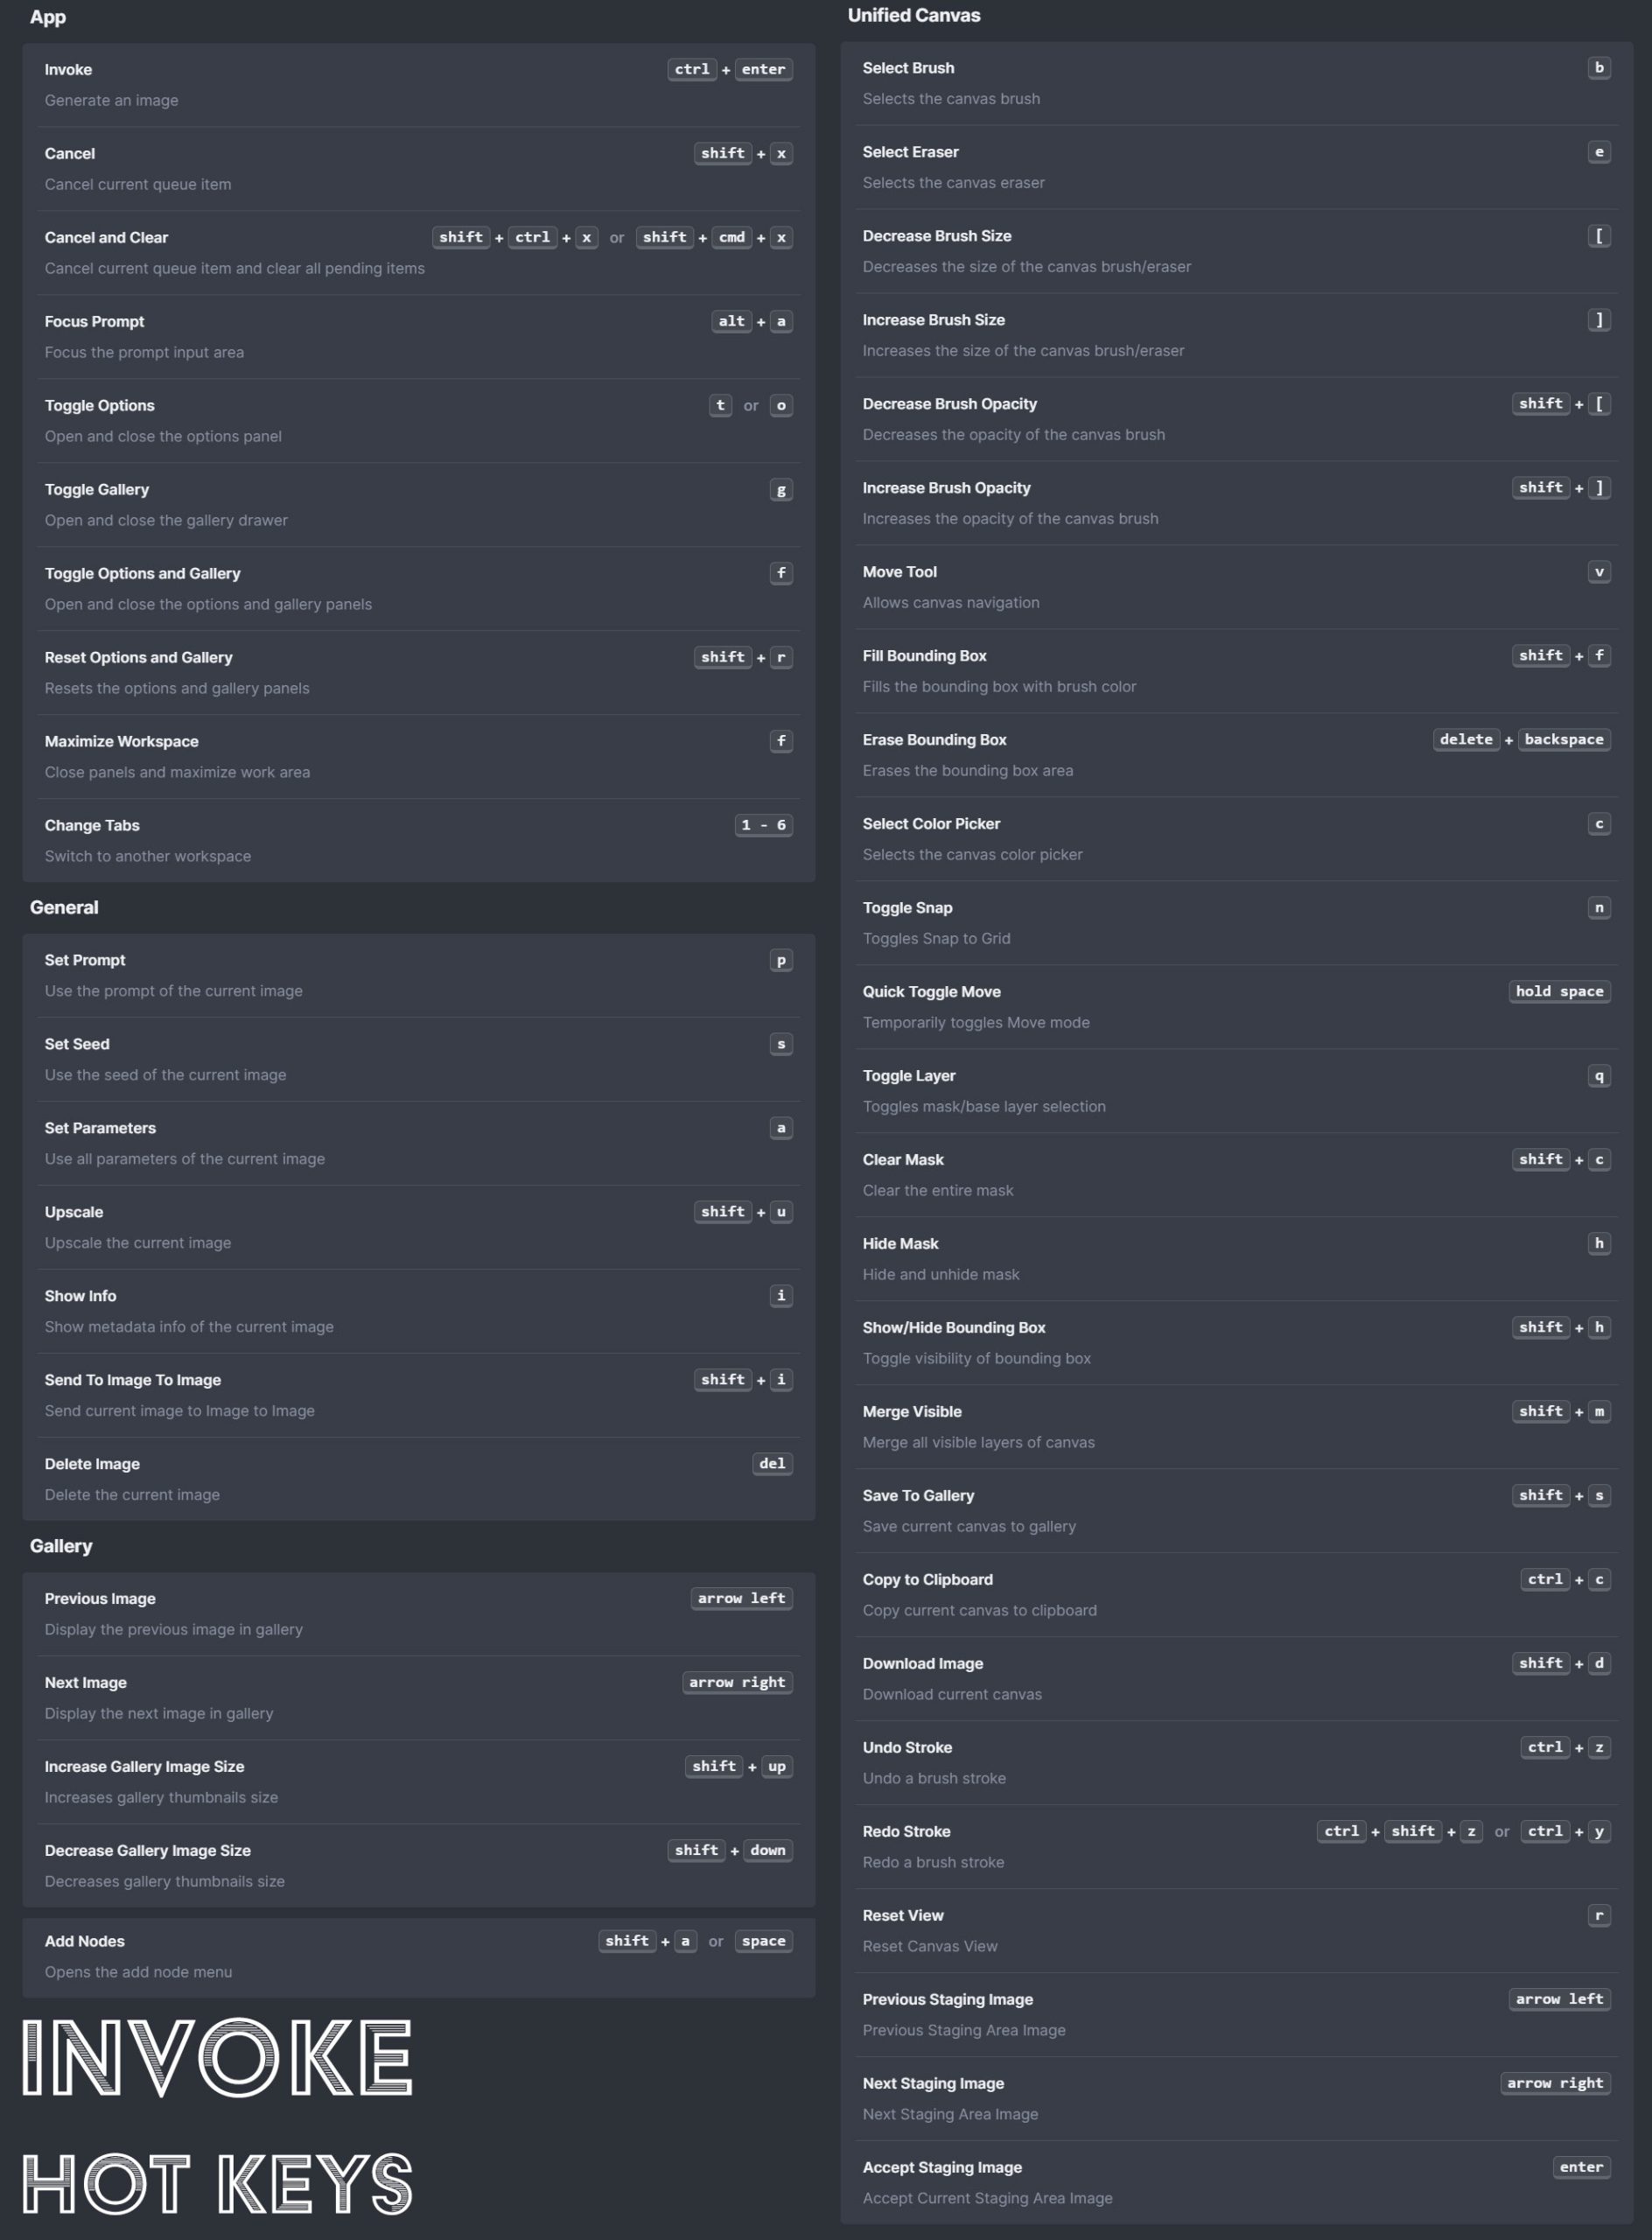
Invoke: How to Install and Manage Models
How to Install Stable Diffusion:
- How to Install Stable Diffusion Web UI (Complete Installation)
- Prerequisites Installation Guide to Stable Diffusion’s Web UI’s
- How to Install Stable Diffusion SDXL 1.0: A Step-by-Step Guide
- How to Install Automatic1111 Web UI for Stable Diffusion
- How to Install Comfy UI: A Streamlined Process for Enhanced Workflow
- How to Install Invoke: Creative AI for Professionals and Enthusiasts


Leave a Reply