Understanding ControlNet Interface in Automatic1111 Web UI
ControlNet is integrated into several Stable Diffusion WebUI platforms, notably Automatic1111, ComfyUI, and InvokeAI UI. Our focus here will be on A1111. With ControlNet, artists and designers gain an instrumental tool that allows for precision in crafting images that mirror their envisioned aesthetics. It’s a transformative approach to art generation. When you efficiently use ControlNet within the WebUI, the horizon of design possibilities broadens significantly.
How to use ControlNet in WebUI?
Navigate to the WebUI dashboard.
Locate the ‘ControlNet’ module.
Activate ControlNet by clicking on “Enable”.
Input your desired parameters or design elements.
Run the Preprocessor using the “Explosion Icon”.
Click ‘Generate’ and watch as ControlNet refines your design.
You just experienced a small sample of what ControlNet can do.
The deeper intricacies of ControlNet Stable Diffusion are what make it stand out. Users are empowered to mold the design by providing the system with images. Activate ControlNet, upload your preferred image, and determine the parameters. This allows for nuanced adjustments, whether for positioning characters or guiding the system in a direction that mere words might not capture.
Table of Contents
So, what exactly does ControlNet achieve? ControlNet fine-tunes image generation, providing users with an unparalleled level of control over their designs. Instead of the system producing images based on general guidelines, ControlNet allows for specific, detailed input. This ensures that the generated image isn’t just any creation—it’s your creation, tailored to fit your exact vision.
How Does ControlNet Work?
ControlNet primarily utilize the power of edge detection to guide image generation using preprocessors. Another term used for this interchangeably is the annotators. At its core, ControlNet is a neural network that takes control of a pretrained image Diffusion model, such as Stable Diffusion. This neural network facilitates the input of a conditioning image, which in turn can be used to manipulate and guide the image generation process. In simpler terms, ControlNet processes an image, identifies its vital features, and produces an edge map. This edge map retains enough data to capture the essence of the original image, laying the foundation for various image transformations and enhancements.
What Can You Do with ControlNet?
At its core, ControlNet enables users to fine-tune image generation, translating abstract ideas into user-defined visuals. By offering predictability, it places users in the driver’s seat, allowing them to mold outcomes as per their vision.
Character Positioning:
ControlNet mirrors specific poses from selected references. Instead of relying on random generation, it provides nuanced control over character representations through advanced posing and referencing tools.
Depth Mapping:
With ControlNet, users can adjust depth maps to emphasize certain elements, creating a detailed 3D perspective.
Architectural Designs:
Using ControlNet’s Machine Learning Straightening and Drawing (MLSD), clear and straight architectural lines can be achieved, ideal for design precision.
Rule-Based Tracing:
Think of ControlNet as a digital tracing tool that adheres to set guidelines. Users can dictate the blueprint for the final visual output.
Image Upscaling:
ControlNet’s Tiling techniques enable upscaling images while preserving intricate details, enhancing the overall visual quality.
Image Compositions:
The synergy between ControlNet and Stable Diffusion ensures that image compositions are precise, reflecting user intentions with accuracy.
What is meant by edge detection?
Edge detection is an established image processing technique focused on discerning the boundaries or contours of objects within images. Imagine it as a tool that sketches the outline of every object or structure in a photograph, highlighting its form and omitting its color and texture.
What is the goal of edge detection?
The primary objective of edge detection is to convert an image into a line drawing that represents the same scene. This conversion is pivotal because the edges in an image house crucial information—think corners, straight lines, curves, and other defining features. Such features become instrumental for advanced computer vision algorithms, laying the groundwork for various applications, from image enhancement to object recognition.
Following the understanding of ControlNet’s underlying mechanism, let’s dive into the practicalities. In the next section, we will explore how to get started with ControlNet, including its installation process and basic operations.

Before diving into the extensive capabilities of ControlNet within Automatic1111’s Web UI, it’s crucial to make sure that the extension is properly installed. The process is designed to be user-friendly, but it’s fundamental to follow it meticulously for optimal results.
For those who desire a thorough, step-by-step walkthrough of the installation procedure, I’ve crafted a comprehensive guide that goes into every detail you need to know to get ControlNet up and running on Automatic1111.

In the early stages of AI image generation, automation was the name of the game. But as the field has grown rapidly, so has the need for tools that put control back in the hands of the creators. ControlNet Stable Diffusion epitomizes this shift, allowing users to have unprecedented influence over the aesthetics and structure…
Navigating the ControlNet Dashboard
Locating the ‘ControlNet’ module in A1111: To find the ControlNet module, look for a clearly labeled dropdown menu within the dashboard. Once you click on it, the Control Panel expands, revealing an extensive menu dedicated to ControlNet functionalities.
Layout Overview
WebUI Dashboard:
Introduction to the main dashboard and its significance.
Locating the ‘ControlNet’ module:
Description of where to find and how to recognize the ControlNet module within the dashboard.


Multi-ControlNet Units
Within the A1111 WebUI, ControlNet boasts a feature known as Multi-ControlNet, also referred to as Multiple ControlNet.
This consists of ControlNet Units up to 10.
Most of us will probably see only 3, but you can change it in Settings > ControlNet > Multi ControlNet: Max models amount.

Think of Multi-ControlNet as similar to layers in tools like Photoshop or Render Layers in applications such as Maya. Each layer or “unit” in this case, can be envisioned as distinct components of an image, each with its distinct set of controlling parameters. For instance, if there’s an image with a man and a distinct background, and you wish to regulate their compositions separately, Multiple ControlNets come to the rescue.
Capabilities in Version V1.1.233:
The version I’m working with, V1.1.233, accommodates three ControlNet Units, ranging from 0 to 2, but you can add more in Settings > ControlNet. It’s imperative to understand that each of these units functions independently. This means for every unit, you’d need to carry out certain tasks: activating them, setting up their Preprocessor, choosing their models, and setting up other relevant parameters.

Related: How to Use Multi-ControlNet to restore an old photo. (Coming Soon)
Single Image Mode:
Start by uploading your chosen image to the image canvas.
Selection of a preprocessor (or what some might recall as an annotator) and a model is paramount.
An example of a preprocessor would be the OpenPose keypoint detector. It’s crucial that the ControlNet model you pick aligns with your preprocessor choice. For instance, if you’re utilizing OpenPose, ensure you pick its corresponding model.
If your image features a white background with black lines,
Configure the preprocessor to the [invert] setting.
In ControlNet V1.1.233, the process is streamlined for you.
Now, by choosing a Control Type, the system automatically pairs the appropriate preprocessor with the corresponding model.
Batch Mode:
You can activate batch mode across units by simply putting any single unit into this mode.
For each unit, specify a batch directory. Alternatively, a new textbox in the img2img batch tab can be used as a fallback. Though positioned in the img2img tab, this feature is versatile enough to generate images in the txt2img tab as well.
Four Icon Buttons:
Located at the bottom right of each ControlNet Unit are four interactive buttons:
Write Icon:
Selecting this icon opens a fresh canvas. You can then utilize the paintbrush tool, which can be combined with an image upload.
Camera Icon:
Clicking this will activate your webcam.
Double Arrow Icon:
A tool to mirror the camera, adding an intriguing twist to your visuals.
Single Up Arrow Icon:
This is your direct link to send dimensions straight to Stable Diffusion.
Canvas Creation:
- Using the built-in paint tool, you can employ the paintbrush and also upload an image to paint directly onto.


Checkboxes Explained:
Enable:
Activates the ControlNet functionality. If it’s unchecked, ControlNet remains unused.
LowVRAM:
Suitable for PCs with older GPUs, such as GTX 1080 or earlier models. It optimizes ControlNet for systems with limited graphics memory.
This option eliminates the need to manually set preprocessor (annotator) resolutions. When activated, ControlNet calculates the ideal annotator resolution, ensuring that each pixel aligns seamlessly with Stable Diffusion. If your input image exceeds 512×512 dimensions, Pixel Perfect will generate the image maintaining that specified resolution. [More on Pixel Perfect here.]
Allow Preview:
Provides a glimpse of the Preprocessor Preview or the visual representation of its render. By selecting it, an additional “Preview as Input” checkbox appears, which lets you view the input in its preview form.

Control Types Explained
1. All
When you choose ‘All’, it opens up every available Preprocessor and Model within the ControlNet dropdown menu. This allows users to view and select from the full range of preprocessing and modeling options.
2. Canny
The Canny control type is an edge detection tool. At its core, edge detection involves identifying points in a digital image where the brightness changes sharply. Canny does this for both the subject of the photo and the background, giving a more comprehensive translation of the scene. This is ideal if you want a rendition that stays true to the original’s form and structure.

The Canny control type serves as an effective edge detection tool, highlighting crucial features in an image. By adjusting the Canny threshold slider, you can control the level of detail it captures. A low setting detects numerous lines, preserving extensive details from the reference image. Conversely, a high setting filters out excess line information.
The Preprocessor Resolution determines the granularity of Canny maps. Striking the right balance is crucial; too low results in pixelation and loss of edge detail, while too high overwhelms with excessive information, leading to random images. A resolution of 512 or higher is recommended to retain essential edge details. You can experiment with both the Preprocessor Resolution and Canny Threshold sliders to achieve the desired edge representation from your reference images.


Canny – Invert (from white bg & black line)
![Set the preprocessor to [invert] If your image has white background and black lines. Canny Invert - Demon roots](https://goldeyes.net/wpmedia/andyhtu/uploads/2023/09/Canny-Invert.jpg)
3. Depth
Depth control provides a way to visualize the spatial hierarchy in an image. It crafts a displacement map—a greyscale representation—where closer objects appear whiter, and distant ones turn darker. This allows for an understanding of the foreground, middleground, and background. It does a great job at capturing depth of field for stylized photos.
Depth Midas
A widely recognized depth estimator. This is great for when you want a conventional depth perception in your images. It does a good job at isolating the subject from the background.

Depth Leres and Leres++
These are more detailed versions, capturing even the subtlest depth variations. They might also bring the background elements into sharper focus.


Zoe
Provides a balance between Midas and Leres in terms of detail

Depth Midas does a good job at isolating the subject from the background
4. Normal
Normal maps are graphical textures used primarily in 3D modeling. The colors in these maps represent vectors—indicating direction: It works like depth, but provides a more 3D like image.
Purple/Blueish: Surfaces pointing towards the viewer.
Greenish: Surfaces pointing upwards.
Reddish: Downward-pointing surfaces.
Normal maps in ControlNet convey the 3D composition of the reference image:
Normal Bae
This one provides a detailed representation of both background and foreground, ensuring a comprehensive 3D feel.

Normal Midas:
It isolates the subjects from the background efficiently.

5. OpenPose
OpenPose is a game-changer in pose detection. It identifies the position and orientation of the human body within images. The details and applications of OpenPose are vast, meriting its dedicated article.
Highly popular for pose detection.
Uses OpenPose extension;
DWPose offers more detail.
Detailed exploration to be covered in a separate blog post which consists of the following:
- Openposen
- Openpose_face
- Openpose_faceonly
- Openpose_full
- Openpose_hand
- Dw_openose_full
Related: How to Use ControlNet’s OpenPose and DWPose to Pose your Subject.
6. MLSD (Mobile Line Segment Detection)
Perfect for architectural designs or when you want linear precision. MLSD emphasizes straight edges, rendering crisp outlines of buildings, interior designs, and more. However, it isn’t ideal for images with lots of curves.
Useful for architectural work and interior design.
Creates linear edge maps, focusing on straight edges, ideal for buildings and interior designs.
Curves are generally ignored.


Using lines generated by MLSD, you can capture the contours of the original design and create something completely new with simple prompts. This will change the way we design architecture.
- Related: How to Use MLSD to create a Neo Noir City (Coming Soon)
7. Line Art
For those who want their images to mimic drawings or sketches, Line Art is the go-to. Depending on the preprocessor, you can achieve anime-style lines, realistic outlines, or even heavier, pronounced lines. For this demo, I’ll be using RealisticVisionV50_v50Vae
I recommend using a model that is meant for art style, but since I like creating realistic images to practice for photography, I like to use RealisticVision more often than not.
Renders the outline of an image for a drawing-like appearance.
Preprocessors
Line Art Anime: Anime-style lines.
Line Art Anime Denoise: Fewer detailed anime lines.
Line Art Realistic: Lifelike lines.
Line Art Coarse: Heavier, realistic-style lines.
Preprocessor: lineart_anime


Preprocessor: lineart_anime_denoise


Preprocessor: lineart_coarse


Preprocessor: lineart_realistic


Preprocessor: Sumo Wrestler Boxer Training Boxing


8. Soft Edge
This is akin to the Canny edge detection but offers softer transitions. Soft Edge is ideal for images where you want edge detection without the harshness, ensuring a smoother visual appeal.
List Edge detection that results in softer, more natural-looking edges.
Preprocessor: softedge_hed

Preprocessor: softedge_hedsafe

Preprocessor: softedge_pidinet

Preprocessor: softedge_pidisafe

9. Scribble
Turn your images into what looks like hand-drawn scribbles. Depending on the preprocessor chosen, the scribbles can range from coarse and bold to cleaner, minimalist lines.
Preprocessor: Scribble HED

Preprocessor: Scribble Pidinet

Preprocessor: Scribble xDoG

10. Seg (Segmentation)
Segmentation is like putting labels on different parts of an image. With Seg, ControlNet identifies and categorizes various elements, making it easier to manipulate or understand an image’s composition in blocks of colors. It’s great for a complicating scene with a lot of objects.
Labels objects in the reference image.
Divides images into distinct parts based on object categories.
Preprocessors:
Preprocessor: ufade20k: Uses ADE20K dataset.

Preprocessor: ofade20k: Uses ADE20K dataset.

Preprocessor: ofcoco: Uses COCO dataset.

11. Shuffle
This control type jumbles up the input image’s elements. It’s not just about creating chaos; the Shuffle control can help transfer the color scheme from a reference image, leading to interesting artistic renditions. I’m not too sure what it’s purpose is at this moment aside from turning things into abstract art.
Disrupts the input image.
Useful for transferring color schemes from a reference image.

12. Tile
When an image needs more detail or requires enlargement, the Tile option comes into play. By adding intricate details and pairing with upscale methods, images look clearer and more refined.
Adds detail and is often paired with upscale methods.
Primarily used for image upscaling.
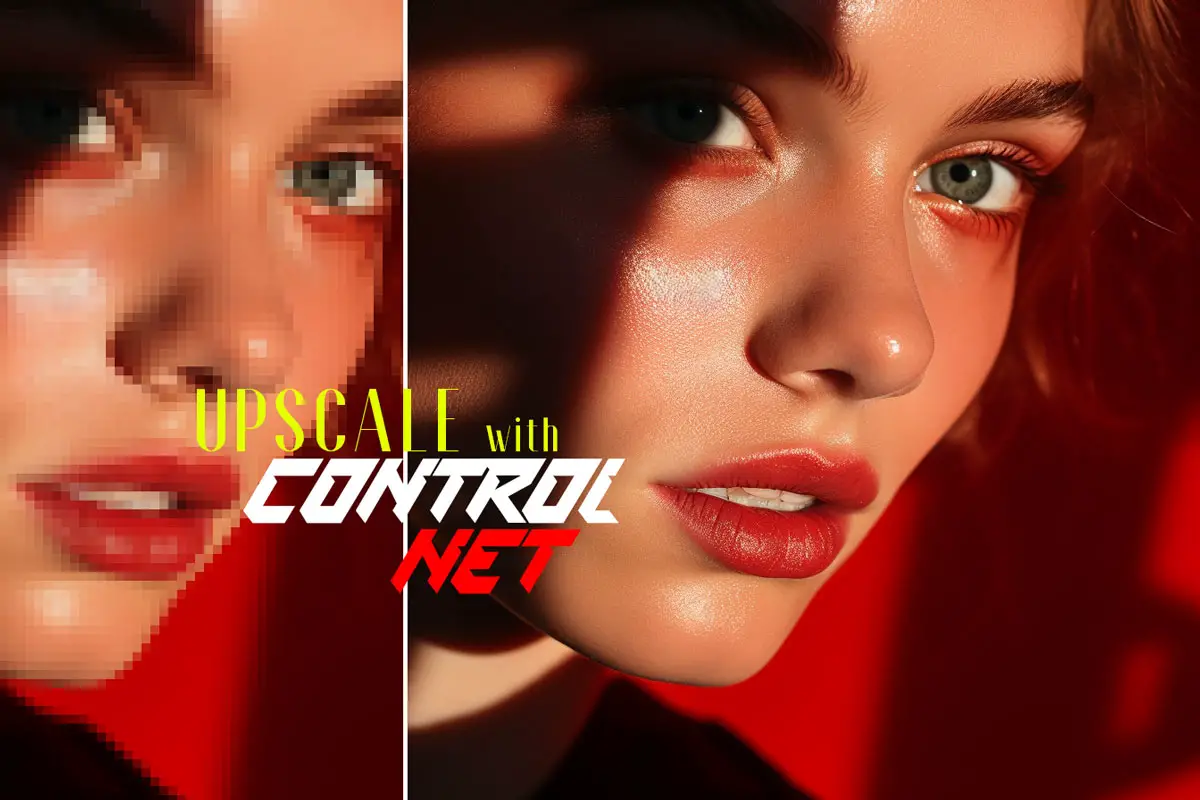
Learn how to upscale Stable Diffusion art with ControlNet Upscale. Ever tried to transform your favorite small image into a massive printable billboard, only to be met with unnatural smoothness, loss of details, or quirky artifacts?
13. Inpainting
Think of this as the healing brush in Photoshop. Inpainting lets users mask, replace, or correct specific objects or areas in an image. Its strength lies in its ability to blend these corrections seamlessly with the rest of the picture. I’ll explore this in another blog dedicated to Inpainting with ControlNet.
Similar to Photoshop’s content-aware fill and generative fill.
Useful for masking, replacing, or fixing objects in an image.
- Related: Inpainting with ControlNet (Coming in the future)
14. IP2P (Instruct pix 2 pix)
This control type translates the attributes of one image (the pix) into another. While it has its uses, other advanced tools might offer better results in certain scenarios.
Similar to the Instruct-pix2pix extension but not as advanced.
Photoshop Generative Fill also does this really well and perhaps better.
- Related: How to use IP2P Instruct pix 2 pix (Coming in the future)
15. Reference
For those times when you want your generated images to closely mirror a reference image, this control type is invaluable. The various preprocessors under this control either link directly to the reference or apply style transfer techniques.
Generates images resembling a reference image.
Preprocessors:
16. T2IA (Text to Image Adapter)
This integrates the A1111 ControlNet extension. It allows text descriptions to guide the image generation, which is an exciting frontier in AI and graphics.
For use with the A1111 ControlNet extension.
Many functionalities overlap with ControlNet models
Hopefully, this provides a more detailed understanding of each control type in ControlNet. Remember, while this is a foundational explanation, the real understanding often comes from hands-on experience, experimentation, and diving deep into the
I’ll explore this topic on T2iA in another article in the future.
Control Mode

Control Modes Explained:
Control Modes allow you to determine the influence between your prompt and ControlNet. Here’s a breakdown:
Balanced:
This mode ensures an even influence from both your prompt and ControlNet. Think of it as a harmonious balance, similar to disabling the “Guess Mode” in ControlNet 1.0.
My Prompt Takes Priority:
Here, the ControlNet’s influence gradually diminishes to ensure your prompts are clearly reflected in the generated images. Technically, this mode reduces the SD U-Net injections, ensuring that your prompt details aren’t overshadowed.
ControlNet Takes Priority:
In this mode, the influence of ControlNet is amplified based on your chosen cfg-scale. For instance, if you set the cfg-scale to 7, ControlNet’s influence becomes 7 times more potent. This doesn’t change your “Control Weights”. Instead, it grants ControlNet a broader scope to interpret or fill in any gaps from your prompts, akin to the “Guess Mode” in the earlier 1.0 version.
Resize Mode Explained:
Just Resize:
This mode simply scales your image to the desired dimensions. It doesn’t remove any part of the image; instead, it stretches or compresses the image proportionally.
Crop and Resize:
In this approach, parts of the image may be trimmed off to fit a specific aspect ratio before it’s resized. This is especially useful if you want to maintain the same proportion but focus on a specific area of the image.
Resize and Fill:
Here, the image is resized, but any extra space (if the aspect ratio changes) is filled with a color or a pattern. This ensures your image fits into the desired dimensions without distorting the original aspect ratio.

What does Control Weight do in ControlNet?
Control Weight in ControlNet sets the degree to which your reference image impacts the end result. In simpler terms, it’s like adjusting the volume on your music player: a higher Control Weight means turning the volume up for your reference image, making it more dominant in the final piece. Think of it as choosing who sings louder in a duet, the main singer (your reference image) or the background vocals (the other elements). Adjusting the Control Weight determines who takes center stage.
Starting / Ending Control Step
The “Starting Control Step” determines when ControlNet starts influencing the image generation process. If you have a process of 20 steps and set the “Starting Control Step” to 0.5, the initial 10 steps create the image without ControlNet’s input. The remaining 10 steps use ControlNet’s guidance.
Think of it like baking a two-layer cake: If you set the “Starting Control Step” to 0.5, then you’d bake the bottom layer without any special ingredients, but for the top layer, you’d add some unique flavors or colors. The first half of the cake remains plain, while the second half showcases the special additions. Similarly, in image generation, the initial portion is plain, but the latter portion is influenced by ControlNet.
ControlNet References: Mikubill / SD-Webui-ControlNet
The ControlNet Blueprint
- Why ControlNet is Setting New Standards in AI Art Generation
- How to Install ControlNet Automatic1111: A Comprehensive Guide
- Understanding ControlNet Interface in Automatic1111 Web UI
- How to Upscale to any resolution using the Power of ControlNet’s Tile and Ultimate SD Upscale
- Understanding ControlNet’s Pixel Perfect in Stable Diffusion
- How to Use Openpose in ControlNet





Leave a Reply