How to Install Automatic1111 Web UI for Stable Diffusion
Installing the Automatic1111 Web UI for Stable Diffusion requires a solid groundwork. If you’ve been following our guide series, you’ve likely laid down this essential foundation. This tutorial builds upon the preparatory steps detailed in our previous blog.
This installation guide presumes that you’ve successfully completed the prerequisites necessary for Stable Diffusion. If you haven’t gone through these steps yet, we highly recommend checking out our comprehensive “Prerequisites Installation Guide to Stable Diffusion’s Web UI’s: Automatic1111, Invoke and Comfy UI” in the links below.

This is the Stable Diffusion prerequisite guide. Here we will learn how to prepare your system for the installation of Stable Diffusion’s distinct Web UIs—Automatic1111, Invoke 3.0, and Comfy UI
Table of Contents
If you’re already equipped with these prerequisites, then you’re in the perfect position to proceed with the installation of Automatic1111. This article will guide you through a simple, step-by-step process, paving the way for a streamlined Automatic1111 setup.
Step 1: Download and Install GitHub Desktop
Step 2: Copy and Paste the Repository
- Go to the Automatic1111 GitHub Repository.
- Copy and Paste the Repository which is the page URL. (Link below)
Step 3: Open GitHub Desktop and Clone Repository
- Launch the GitHub Desktop app
- Go to File > Clone Repository > Click on the URL tab
- Paste the repository link to the Repository URL location.
- For the Local Path, select the folder you want to install Automatic1111 in.
- Click on “Clone” to clone the repository to your local path.

By following these detailed steps, you can confidently install Stable Diffusion, leveraging the convenience and rollback capabilities offered by GitHub Desktop, along with the compatibility of Python 3.10 and the essential Git command line tool. This approach ensures a smooth installation experience.
Step 4: Run the Windows Batch File to Install Dependencies
Proceed to run the provided Windows Batch File (.bat). This file automates the installation of all the necessary components required for Automatic1111 to function properly. Here’s how to proceed:
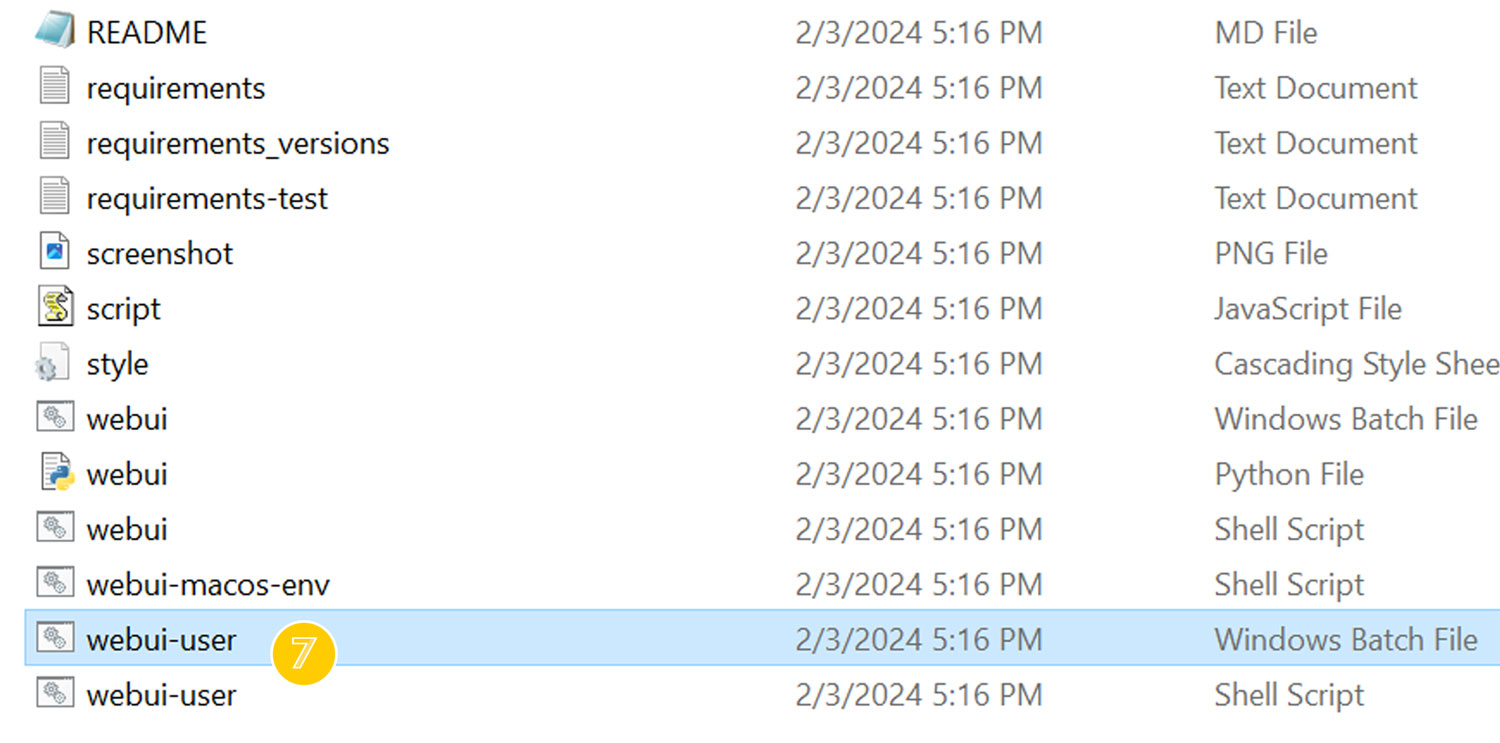
- Locate the webui-user windows Batch File in the downloaded files or repository.
- Double-click on the webui_user.bat file to execute it.
- The .bat file will initiate the installation process, which may take some time to complete. Be patient and let the process run until it finishes.
- You’re now done Installing Automatic111, but we’re going to install xformers to improve the performance.

Step 5: Installing Xformers
To install Xformers for Stable Diffusion, follow these steps:
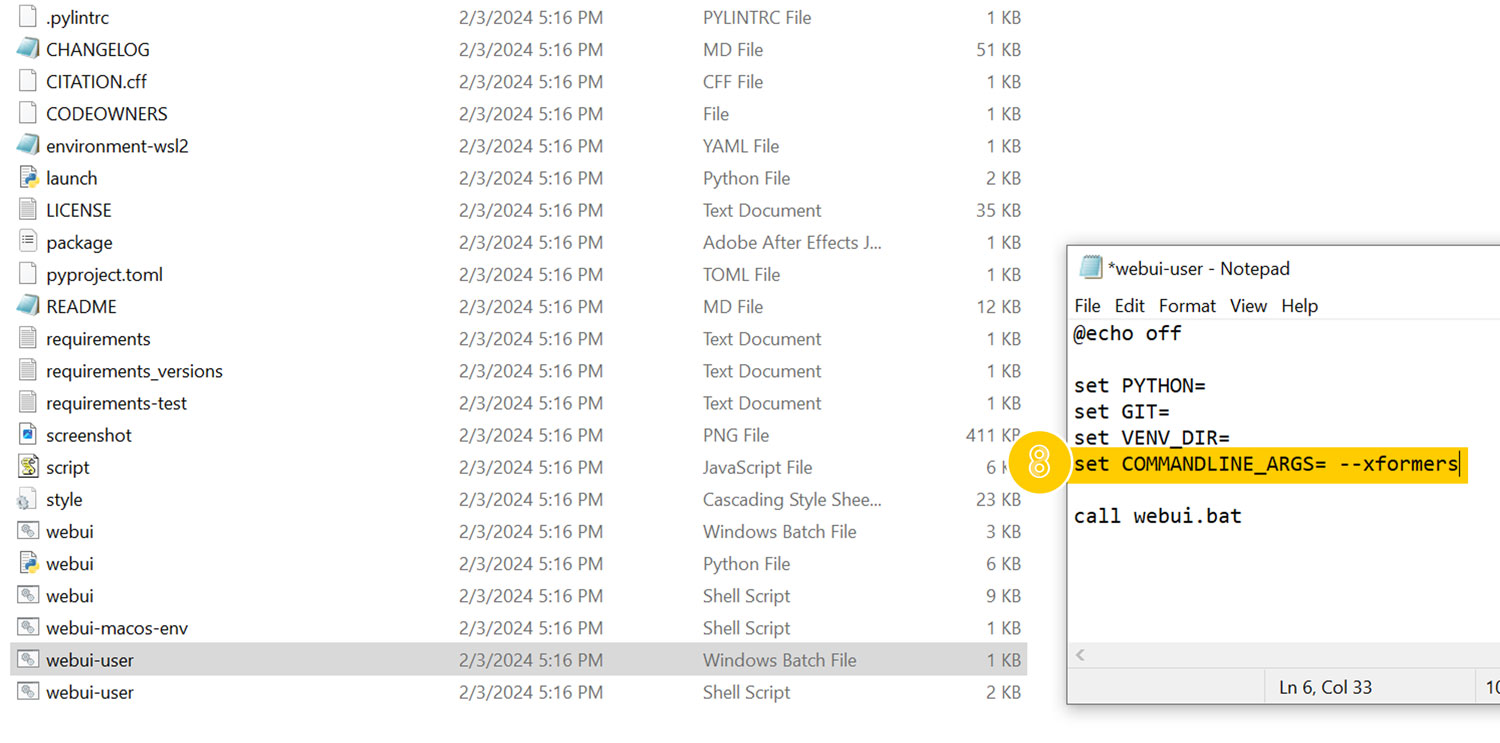
- Locate the “webui-user.bat” Windows Batch file.
- Right-click on the file and select “Edit” to open it.
- In the line that says “set COMMANDLINE_ARGS=”
- add “–xformers” at the end. The modified line should look like this:
- “set COMMANDLINE_ARGS= –xformers“
- Run the “webui-user.bat” Windows Batch file again.
- You’ve now successfully installed the WebUI and can proceed with using Stable Diffusion with it’s improved performance.

You’re now ready to use Stable Diffusion. If you’re interested in exploring installation options for extensions, see my detailed guide below.

Enhance your Stable Diffusion experience with Automatic1111 Extensions. Follow our comprehensive guide to install Automatic1111 extensions.
Optional Step: Updating Xformers
Warning: Do not do this unless you need to.
Xformers, an optimization library essential for speeding up generation processes, tends to update automatically whenever you initiate A1111. However, sometimes, it doesn’t quite work as expected. I’ve experienced this issue firsthand, so I’ve laid down a step-by-step guide to help you check if you have the latest version, and if not, how to manually update it.
Verifying and Updating Your Xformers Version
- Locate Your A1111 Installation Folder:
Head to your A1111 installation. In my setup, it’s labeled “stable-diffusion-webui”. - Access Command Prompt in the Folder:
- Once inside the “stable-diffusion-webui” directory, look at the top directory bar, which displays the folder breadcrumb.
- Click on the empty space right next to the breadcrumb. This action will make the path editable.
- Now, type “cmd” and hit Enter.
- A command prompt will open with the directory, something like: D:\stable-diffusion-webui>
- Activate the Virtual Environment:
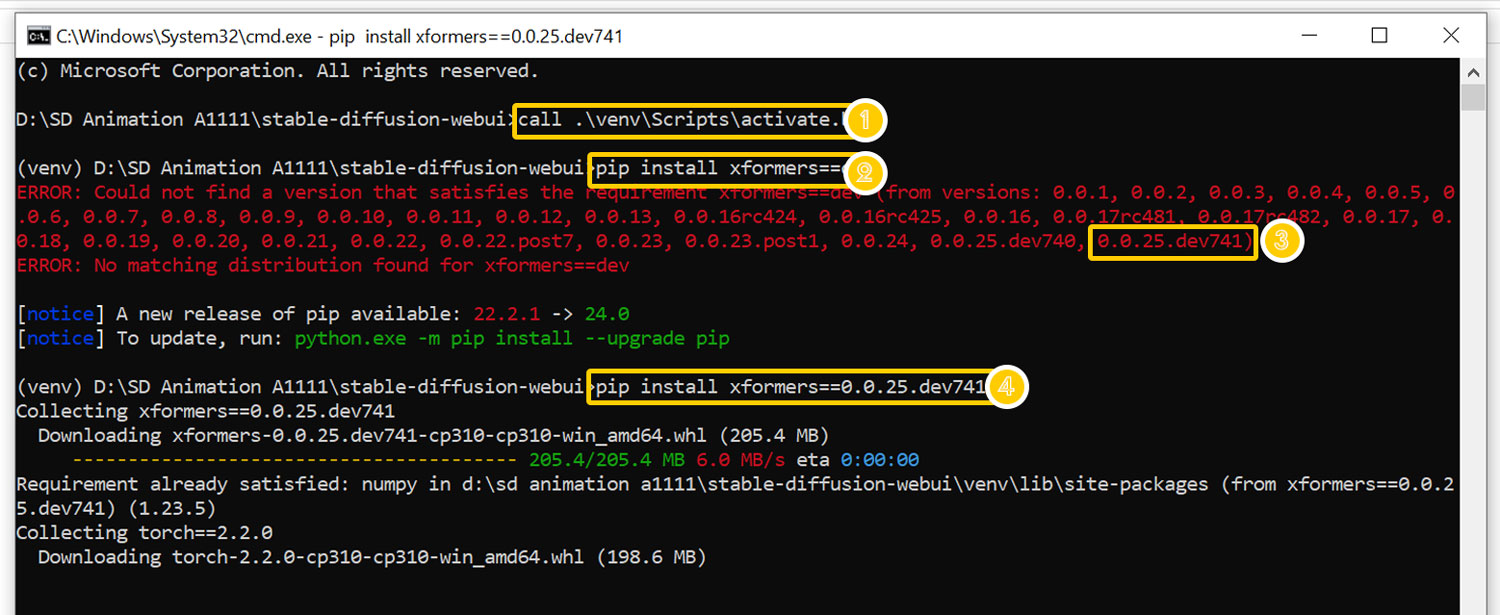
Enter the following command: call .\venv\Scripts\activate.bat- List Available Xformers Versions:
- To see all versions of Xformers, type: pip install xformers==dev
- The highlighted version will indicate the latest one. (The last one on the list)
The version can vary depending on when you’re going through these steps.
- Install the Latest Xformers Version:
- Using the latest version you identified in the previous step,
type: pip install xformers==[your-identified-version-number] - For instance, during my last check, the version was 0.0.25.dev741, so the command was:
pip install xformers==0.0.25.dev741 - Press Enter to start the update.
- Using the latest version you identified in the previous step,

If you’ve followed along, your command prompt should look something like this:

How to Manual Update WebUI with GitHub Desktop
- Navigate to the installed file in GitHub Desktop
- Select the repository, and then click ‘Fetch Origin.’

How to Install Stable Diffusion:
- How to Install Stable Diffusion Web UI (Complete Installation)
- Prerequisites Installation Guide to Stable Diffusion’s Web UI’s
- How to Install Stable Diffusion SDXL 1.0: A Step-by-Step Guide
- How to Install Automatic1111 Web UI for Stable Diffusion
- How to Install Comfy UI: A Streamlined Process for Enhanced Workflow
- How to Install InvokeAI 3.0: A Cleaner Web UI for Stable Diffusion


Leave a Reply