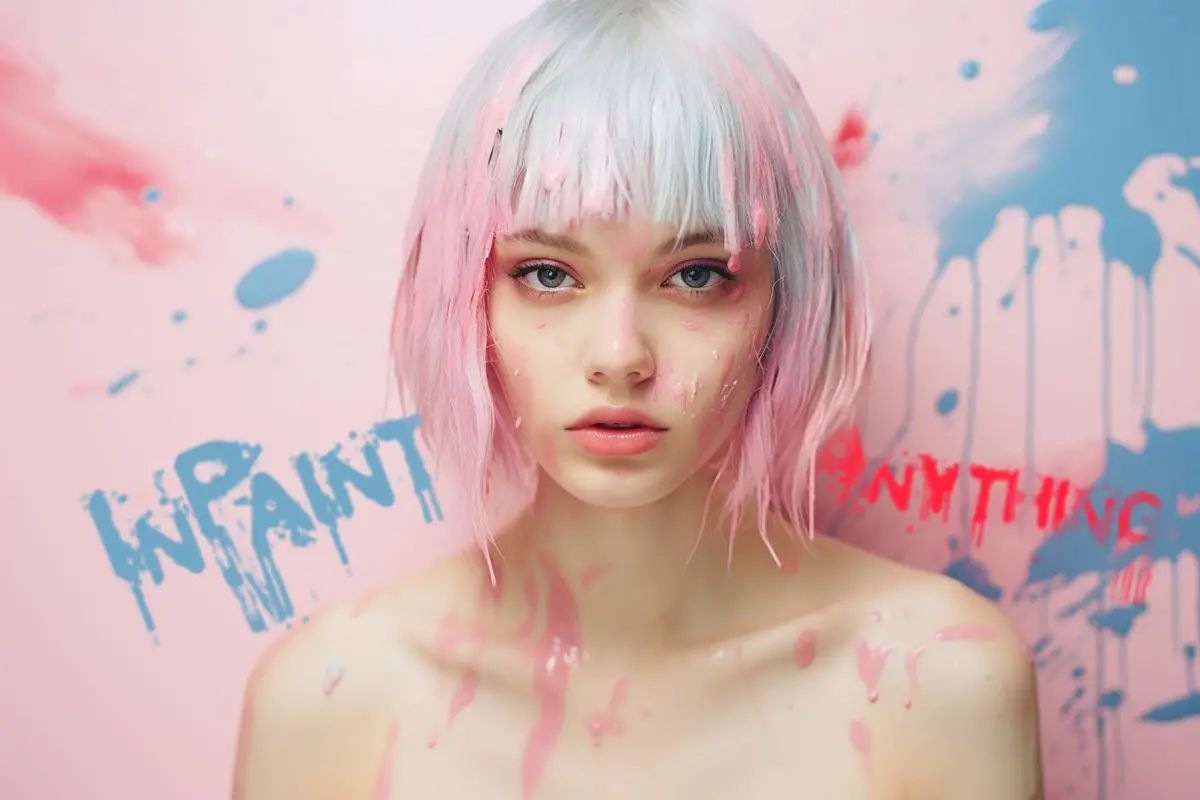
Inpainting 101: How to Inpaint Anything in Stable Diffusion using Automatic1111
Inpainting in Stable Diffusion does some incredible things. It’s a feature found in some web UI’s for AI art generators. It lets you remove unwanted elements from a picture or add things that were never there in the first place. You can even swap out objects and fix imperfections. These are just the early tricks up its sleeve; the potential is staggering and has been changing many workflows in art direction.
You might have heard of Adobe’s Generative Fill Tool, which is very powerful. But it comes with a big limitation due to censorship and make’s it a bit difficult to work with. This makes certain demographics of users excluded from this amazing feature. It’s mind-blowing in what it can do, flawlessly replacing elements in images, but it has its hands tied with the sensitivity of censorship.
Stable Diffusion isn’t quite as perfect right out the box, but it’s getting pretty amazing and way more flexible leading to a far more robust set of tools. What sets it apart is the complete freedom it gives you. No censorship, no limits – you can let your imagination soar. This blog aims to serve as a cornerstone post that links you to other advanced and relevant tutorials on Stable Diffusion Inpainting within Automatic1111. Feel free to return here for ongoing updates and additional content.
In this guide, we will explore Inpainting with Automatic1111 in Stable Diffusion.
Table of Contents
Let’s get started by understanding the user interface of inpainting in Automatic1111. Knowing where to find the tools and features is essential for a smooth experience.
To begin, open Automatic1111
Look for the “img2img” (image2image) tab.
Under this tab, you’ll find the “Inpaint” option.
Click on it to enter the inpainting workspace.

Once you’re in the inpainting section, you’ll notice a set of tools. These highlighted tools are unique to inpainting tasks and the other sections are similar to those in other parts of Automatic1111. Familiarity with these tools will help you work efficiently.
In A111, there are two additional tabs worth exploring: “Inpaint Sketch” and “Inpaint Upload.”
These tabs offer unique features for handling masking and image editing.
Inpaint Sketch is a creative tool with multiple functions that make it useful for various purposes. At its core, it’s a coloring tool that uses the masking features of Inpainting, but it offers much more. [Source]
Adjusting Denoising Strength:
One of its key features is the ability to adjust the Denoising Strength. This parameter affects how closely the rendered image aligns with your coloring lines. Lowering it, say to 0.5, can significantly improve color visibility, especially in intricate areas.
Beyond Coloring:
However, Inpaint Sketch is not limited to coloring alone. It has the capability to do more. You can use it to remove unwanted elements from an image, reshape compositions, and even add new elements. For instance, you can eliminate a wardrobe, create a makeshift window, or paint entirely new objects.
Preserving Shapes:
Lowering the Denoising Strength to around 0.56 can help preserve the shapes in your image during rendering. This can be crucial when you want to maintain the integrity of certain elements.
Sketch vs. Inpaint Sketch: It’s important to distinguish between “Sketch” and “Inpaint Sketch.” Sketch essentially generates a brand-new image, closely resembling your initial prompt. It’s suitable when you want to maintain the same theme or concept as your original input.
On the other hand, “Inpaint Sketch” selectively re-renders only the masked area without altering the entire image. This means you can use entirely different prompts for this masked section. For example, if you want to replace a red blob with a red UFO, you can use Inpaint Sketch with a prompt like “red UFO in the room.”
In essence, Inpaint Sketch offers more flexibility for targeted adjustments within an image, making it a tool that allows object replacements with designated color subjects.
Inpaint:
Inpaint serves as a precise tool, altering only the region inside the mask. It allows for focused changes within the designated area, making it a valuable tool when you want to modify specific portions of an image with accuracy.
Sketch:
In contrast, Inpaint Sketch offers a more creative approach. It acts as a color guidance tool, permitting changes across the entire image rather than restricting modifications to predefined areas. This flexibility allows for complete color transformations and artistic experimentation. If you’re already skilled in art, this feature can be particularly appealing, offering new possibilities for image manipulation. It’s a tool worth exploring in-depth, making it a promising candidate for future blog experiments.

Above: I painted a blue mask and prompted, “blue walls”

Above: I painted a green mask and prompted, “Paint on the walls”
Inpaint Sketch:
npaint Sketch combines Inpaint and Sketch concepts. It allows changes only in regions you’ve sketched while keeping the rest unchanged. You can use different colors in your masks for added creative control. Precision is essential, as it precisely replaces what you draw. To fine-tune results, adjust denoising strength and masked content. Be aware that less defined sketches may result in outlining or artifacts during image generation, requiring some trial and error. For complex tasks, Photoshop’s Generative Fill may be preferable. Use “Only Masked Padding, Pixels” to clean up artifacts and improve the final result.
A friend of mine, DarkStoorM provided me with a powerful workflow for Inpainting and I’d love to break it down for you in a future post while studying his workflow.


While these results aren’t flawless, they serve as a useful comparison of how each Mask Content functions in various denoising steps. There’s still room for improvement and a deeper exploration of these refinements, which I’ll cover extensively in a future post below.
Inpainting with the paint tool in A111 can sometimes be challenging, especially when precision isn’t crucial. However, certain situations call for precise masking, or you may find yourself needing to reuse a mask repeatedly. Repainting the same mask multiple times can be both cumbersome and time-consuming. This is where “Inpaint Upload” comes into play as a solution.
Inpaint Upload: In this section, you’ll be required to upload two key components: the source image and the mask. The mask should be presented in a black and white format, often referred to as an alpha map. In this representation:
The masked area is depicted in white.
The unmasked area is depicted in black.
Black signifies full transparency (masked).
White signifies full opacity (not masked).
Shades of gray signify varying levels of partial transparency.

The white section denotes the portion of the image that will undergo changes, while the black section remains unaltered. However, keep in mind that this can be reversed using the Mask Mode, which we will discuss later.

In the image depicted above, you’ll notice that only the white portion underwent changes. This alteration occurred because we specifically instructed the Inpaint tool to regenerate this area. In contrast, the black portion, representing transparency, remained untouched, leaving the remainder of the image unaltered.nnPlease keep in mind that achieving the desired result with Stable Diffusion often involves multiple iterations. It’s unlikely that you’ll achieve the perfect outcome on your first or second attempt. Instead, it typically involves a fair amount of trial and error, where you’ll need to experiment with various slider settings.
Factors like Mask Blur and Masked Paddings play pivotal roles in fine-tuning your results. While online tutorials may make it seem effortless, the reality is that mastering Stable Diffusion is a process filled with trial and error, and it requires tweaking to get it just right. So, don’t be discouraged if you don’t succeed on your initial attempts; persistence and experimentation are key.

I encourage you to follow along with me using these exact prompts, seeds, and parameters. This way, you’ll be working with the same images and settings, making the learning process much smoother and more effective.
Download these Models at Civitai.com:
epiCPhotoGasm Style Negatives (colorfulPhoto & softPhoto)
vae-ft-mse-840000.safesensors (This must be selected in SD VAE settings)
You won’t necessarily utilize all three options, but having the complete set will be valuable for your future learning with this model.
Prompt:
| A close up portrait of 22 years old (Quebecoise | Hapa:0.5 | Colombian | Argentinian | Cuban | Mexican | Russian | Latvian | Hungarian | Ukrainian) woman looking at camera, slim body, dark theme, soothing tones, muted colors, high contrast, (natural skin texture, hyperrealism, soft light, sharp), freckles, (acne:0.6), ultra detailed texture French haute couture corporate outfit, Cannon EOS 5D Mark III, 85mm |
Negative Prompt:
| (worst quality, low quality, normal quality, lowres, low details, oversaturated, undersaturated, overexposed, underexposed, grayscale, b&w, bad photo, bad photography, bad art:1.4), (watermark, signature, text font, username, error, logo, words, letters, digits, autograph, trademark, name:1.2), (blur, blurry, grainy), morbid, ugly, asymmetrical, mutated malformed, mutilated, poorly lit, bad shadow, draft, cropped, out of frame, cut off, censored, jpeg artifacts, out of focus, glitch, duplicate, (airbrushed, cartoon, anime, semi-realistic, cgi, render, blender, digital art, manga, amateur:1.3), (3D ,3D Game, 3D Game Scene, 3D Character:1.1), (bad hands, bad anatomy, bad body, bad face, bad teeth, bad arms, bad legs, deformities:1.3) |
Parameters:
| Width: 768 | Sampling Method: DPM++ 2m Karras | Sampling Step: 20 |
| Height: 768 | CFG Scale: 7 | Seed: 2976823394 |
Enter the Prompts in the Prompts and Negative Prompts.
Click the “Generate” button.
Send generated image to the InPaint sesction.
Now Let’s Explore!
This creates a blur around your masks to give it a feathering effect when you’re generating the images. It helps reduce the hard lines that may occur when you’re inpainting, which can create those unwanted halo or hard edge effect. At Mask Blur of 0, you’ll have a hard edge as seen in this picture below. At 64, it is maximum feathering, but you don’t always want that. This also matters depending on the size of the mask and image.nnToo much of a blur may result in seeing nothing generated.

Mask Mode is a feature that allows you to control how Stable Diffusion processes different parts of an image based on whether they are masked or not. Here’s how it works:
Inpaint Masked:
When you select “Inpaint Masked” in Mask Mode, Stable Diffusion will primarily focus on the areas you’ve marked or masked in your image. Imagine this like a painter who is meticulously working on a specific part of a canvas while leaving the rest untouched. It’s like telling the tool to pay special attention to the masked portions and generate new content or make changes specifically within those areas.
Inpaint Not Masked:
On the other hand, when you choose “Inpaint Not Masked” in Mask Mode, Stable Diffusion will concentrate on the areas of the image that are not masked. Picture this as the painter shifting their attention away from the masked portions and focusing entirely on the unmasked parts. It’s like saying, “Ignore the masked areas, and only work on everything else.”
In simpler terms, Mask Mode is like having two different brushes or tools in your creative toolbox. One brush is for detailed work within the masked regions, while the other brush is for the unmasked areas. You can use these brushes strategically to achieve your desired artistic or editing effects. It gives you precise control over where you want changes to happen in your image, whether it’s adding details to specific objects or leaving some parts entirely untouched.
In summary, Mask Mode with “Inpaint Masked” and “Inpaint Not Masked” options gives you the ability to direct Stable Diffusion’s attention precisely where you want it within your image, like a skilled painter focusing on different parts of a canvas.nnTry generating with a blur of 0, 30 and 64 and see for yourself what the difference is.
The “Masked Content” section offers four distinctive modes: Fill, Original, Latent Noise, and Latent Nothing, each serving specific purposes: [Source]
Fill:
In this mode, the masked area is filled with colors extracted from the image. It essentially blends the inpainted region with the existing image palette.
Original:
The “Original” mode retains the content that was initially present in the masked area. It generates the next image based on the original content beneath the mask. This mode is typically used when you want the inpainted result to align closely with the original image.
Latent Noise:
“Latent Noise” replaces the masked area with randomly generated noise from the latent space. This option creates something entirely new in the designated region. “Latent Noise” and “Original” are the modes you’ll commonly use.
Latent Nothing:
In “Latent Nothing” mode, the masked area is filled with latent space zeroes. Stable Diffusion replaces this region with a single solid color that blends with the surrounding pixel colors. This mode is ideal when you desire an inpainted output that significantly differs from the original image while retaining a semblance of its color scheme.
“Latent Noise” and “Latent Nothing” are particularly useful when you aim to create entirely different content from the original image, such as removing or concealing objects. These modes initialize the masked area with content unrelated to the original image, effectively starting from a blank canvas.
It’s important to note that when using “Latent Noise,” adjusting the denoising strength may be necessary to achieve the desired result. “Original” and “Fill” are suitable for maintaining similarity to the original image but may pose challenges when attempting to create new elements atop the existing content. For instance, generating blindfolds using the “Fill” mode might yield unexpected results due to the mode’s adherence to the original image.
When to Use “Latent Noise” and “Latent Nothing”:
These modes are handy when you want to generate content that’s entirely different from the original image, such as removing objects. They start with a blank canvas based on noise from the seed number.


Gone are the days when I had to sit in class, slaving away with my pen, drawing mustaches and beards on the faces in my history books. Today, thanks to Stable Diffusion’s InPainting, I can do that with the click of a button. Mix and match these four modes, and you’ve got some great beards. Of course you can’t use Masked Content without understanding how to use it with the Denoising Strength.
Let’s experiment with the denoising strength. Until now, we’ve had it set at .75, giving the model a lot of creative freedom. This has had a significant impact on the Masked Content we’ve been working on.
Now, try setting the denoising strength to .4. With this change, you’ll notice that the original image and latent noise image will appear quite different.
The “Original” mode relies on having some content to work with. If there’s nothing there, it may not make any changes. In such cases, you can use “Latent Noise” to introduce some randomness. This way, you can send the image to Inpaint, make edits, and utilize “Original” and “Fill” modes effectively because there’s content to work on.

Above, you can observe the impact that increasing your denoising strength can have. Since there’s no universal solution, it’s essential to experiment with parameters to find what best suits your needs.
Tips:
Recommended Denoising Strength 0.3 – 0.8
Below 0.3 you will see very little changed in the masked area.
Above 0.8 are mostly or completely replaced.
Reinserted the negative prompts
In the prompts, I removed all existing text and simply entered “Sunglasses.”
I applied a mask to the area where I wanted the sunglasses to appear
Clicked the “Generate” button.

As you may have noticed, the sunglasses appear almost perfect but with a significant issue – they are cutting/clipping through her face, which is clearly unintended.
You should extend the masking region further to ensure it accommodates the size of the sunglasses. Keep extending it until the sunglasses no longer intrude upon her face.

The result is the sunglasses appearing perfectly in the “Inpaint masked” version. However, in the “Inpaint not masked” version, you may have noticed a noticeable halo effect around the eyes.
Furthermore, everything outside of this region appears smoother and less detailed. This occurs because our prompts lack detail, containing only the word “Sunglasses.” Consequently, the model defaults to its base generation for the remainder of the image outside the eye area, as it lacks specific instructions for that portion.
The Inpaint area offers two modes: “Whole Picture” and “Only Masked.” These modes enable you to determine how image samples are utilized to enhance detail in specific areas. With these options, you can either modify image sections, boost resolution in specific regions, or mend damaged areas as needed.
This serves as the default option. In this mode, Stable Diffusion generates new output images by considering the entire input image. It then blends these output images into the specified inpaint area, adjusting the blending based on the mask blur you’ve defined.
When you opt for this mode, Stable Diffusion focuses solely
on the areas you’ve designated. It upscales these areas to the width and height you’ve specified, generates new content based on this region, and then downscales it back to the original size. This process helps preserve small inpaint areas that might otherwise go unnoticed, preventing the inpaint process from failing to produce any changes in the output.
Additionally, when choosing “Only Masked,” you can specify the amount of “masked padding” in pixels. A higher masked padding value will result in an output that closely resembles the input image, as it considers more of the surrounding context during inpainting.
Masked Padding, Pixels applies when using “Only Masked” in your Inpaint Area. It’s crucial for refining inpainting. This setting zooms in on the masked region, focusing on generating details while matching its surroundings. Maxed Padding expands the area from which information is gathered.
Zoom and Detail:
Higher pixel values lead to less zoom, capturing more surrounding pixels for context but with fewer details. Lower values zoom in closely, offering finer details but less context, potentially making it less synchronized with the rest of the image.
Balance Matters:
256 provides a wider view akin to the “Whole Picture,” while 0 zooms in significantly but may lack surrounding data. Finding the right balance is key. [Source]
Adjust Mask Blur and Masked Padding:
Experiment with the Mask Blur and Masked Padding settings. Tweaking these settings can help mitigate haloing and enhance detail preservation.
Modify the Prompt:
Consider replacing the initial “Sunglasses” prompt with a different one or even the original prompt. If you opt for the original prompt, you may end up with a similar outcome. To explore alternative results, it’s advisable to try a new prompt.
In essence, these adjustments allow you to fine-tune the inpainting process and achieve the desired outcome, avoiding unwanted halo effects and retaining essential image details. Changing the Mask Blur and Padding parameter can also drastically change the look of the image, so be mindful of that.

In this image, I applied “Inpaint not masked” and introduced a prompt modification. In the original prompt, we altered her age from 22 to 80 years old. As a result, you’ll observe that everything within the masked region still portrays the young 22-year-old woman. However, the area outside this region has undergone significant aging.
Nevertheless, you might notice that the region around her eyes still appears too youthful, and the halo effect is still somewhat present. While these effects may be somewhat subtle, they are worth addressing.nnAdjusted Prompts:
You now have a solid grasp of the basics of inpainting. However, don’t stop here! Continue learning advanced techniques using the InPaint Anything extension and ControlNet Inpainting.
The Stable Diffusion Inpaint Anything extension enhances the diffusion inpainting process in Automatic1111 by utilizing masks derived from the Segment Anything model by Uminosachi. In simpler terms, Inpaint Anything automates the creation of masks, eliminating the need for manual input. This streamlines the process, improves mask accuracy, and potentially leads to better inpainting results while saving time and effort.
In contrast, Automatic1111’s native masking tool lacks precision and control, making it similar to basic software like Microsoft Paint. This can be time-consuming and frustrating.
For those seeking a more efficient solution, the Stable Diffusion Web UI Inpaint Anything extension offers a faster and more accurate alternative. It automates object identification and mask creation, bypassing the slow and imprecise manual steps.
Inpaint Anything is a pretty big tool and needs an entire blog dedicated to it. To get started with Inpaint Anything and learn more about its installation and usage, please read the tutorials by clicking the provided links below.

Learn How to Install Inpaint Anything for Stable Diffusion easily. Follow this comprehensive guide for a user-friendly installation process.
Inpainting within ControlNet
ControlNet also offers an Inpainting feature as part of its toolset, but I’ll save that discussion for a separate blog. ControlNet, available in Automatic1111, is one of the most powerful toolsets for Stable Diffusion, providing extensive control over inpainting.
For an in-depth guide on using the full potential of InPaint Anything and ControlNet Inpainting, be sure to check out my tutorial below. If you’re you’re not yet familiar with it ControlNet, check out my ,tutorial here to get started.
Inpaint Anything (Coming Soon)
ControlNet Inpainting (Coming Soon)


Leave a Reply