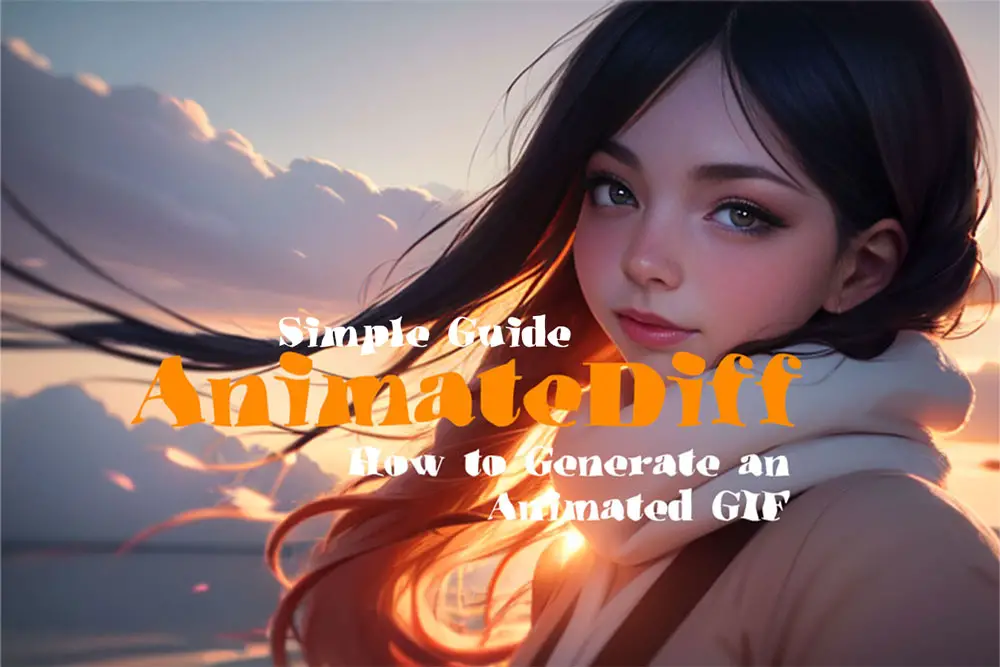
Simple Guide: Create amazing Animated GIF using AnimateDiff in Automatic1111
Learn how to effortlessly create a captivating Animated GIF using AnimateDiff with this quick and user-friendly guide. You’ll discover simple settings that make the process a breeze, resulting in stunning animations that grab your audience’s attention.
Create an Animated GIF using AnimateDiff
In this guide, my goal is to simplify the process and make it easy for you to follow. I’ll get straight to the point, and as we progress, I’ll provide links for more advanced tips once I gain a deeper understanding on how to use AnimateDiff.
First, you need to have Automatic1111 installed. Then, you’ll want to install the AnimateDiff Extension. You can either install it via GitHub Desktop using a GitHub Repository or directly through the extension. Below, you’ll find links to guides on how to do this.
Table of Contents

AnimateDiff is an innovative tool that utilizes diffusion models to breathe life into your generative art, resulting in captivating animated GIFs. By infusing motion into text or image inputs, AnimateDiff paves the way for a fresh approach to animation, free from the constraints of traditional methods. It represent advancement in the way animation may be…

n What is AnimateDiff and How Does it Work? n To start, let me explain what AnimateDiff is and how it works. AnimateDiff is an extension for Automatic1111 that simplifies the creation of GIF animations from static images or text prompts. You can activate it within the Automatic1111 interface. Customizing your animations is made easy…
Now, let’s get our hands dirty and learn how to use AnimateDiff to create something impressive.
Open the AnimateDiff dropdown menu.
While you can experiment with various Stable Diffusion models to generate animated GIFs,
it’s often recommended to use a fine-tuned model, such as “toonyou,” found on Civitai.com, for the best results. Models that create animated styles tend to yield superior outcomes, although AnimateDiff can work with most models. (Optional: Download ToonYou Here)
Once you’ve downloaded and activated AnimateDiff, let’s get started with prompts. You can either use prompts from other users’ uploads or follow the prompts I’ve provided below. Keep in mind that every fine-tuned model comes with specific recommendations for achieving optimal results. Take a moment to understand these recommendations.
For this tutorial, I’ll be using the “Ether Real Mix” model by gamerdan69 on Civitai.com. It’s a personal favorite of mine. This model requires the ‘kl-f8-anime2 VAE. and you can download both the VAE and Model below:
| Prompt: |
|---|
| masterpiece, best quality, realistic, 1girl, illustration of a girl floating in the sky, scarf, floating hair, close-up, warm soft lighting, sunset, cloud, cloudy sky, (sparks:0.7), (light particles:1.1), volumetric lighting, smug, smirk |
| Negative Prompt: |
|---|
| NSFW, (worst quality, low quality:1.3) |
Settings:


| Sampling Method: DPM++ 2m Karras | Sampling Steps: 20 |
| Width height: 512×512 | CFG Scale: 9 |
| Clip Skip: 2 | Seed: 3482200662 (This is optional.) |
To start, I recommend these settings to get you on your way to creating something impressive. We’re going to keep it simple and focus on one model, but you’ll need to understand the functions of some of these Motion Models in the future, and I’ve written a comprehensive guide on each one below.

Download and learn aboutthe power of AnimateDiff Motion Models! Unlock the potential of motion dynamics and LoRa control for captivating animations.
On the txt2img tab, scroll down to the AnimateDiff section, and input the following settings:
Motion Module:
mm_sd_v15_v2.ckpt
Enable AnimateDiff:
Yes
Number of frames:
32 (equating to a 4-second video)
FPS:
8 (4 seconds at 8 frames per second)
Click “MP4”
Click GENERATE
You can leave the remaining settings as default, and once you hit “generate,” you’ll have a 4-second video ready to go.

Above I recommended a 512×512 resolution. However, during my experimentation, I pushed the boundaries by testing a wider format, specifically Width 910 x Height 512, to achieve a more cinematic ambiance. It’s important to note that you’ll achieve nearly identical results with the standard 512×512 setting. I recommend starting with the 512×512 resolution initially because it’s compatible with AnimateDiff and is less likely to strain your GPU.
Final Thoughts
Beginning with a deliberate focus on the fundamental setup for generating your first animated GIF, I’ve kept things simple. Now that you’ve got the hang of it, you can explore further guides that go deeper into maximizing the potential of the additional parameters and fine tune what we already created and make it better using interpolation techniques and prompt travels.
| It’s advisable to have a graphics card with a GTX 3090 or higher due to AnimateDiff’s VRAM-intensive nature. If you’re using a lower-spec GPU, you may encounter errors. In such cases, I recommend utilizing Google Colab or RunPod, both of which I’ll provide a guide for in the future. Additionally, it’s worth noting that I faced occasional errors, although the reasons behind these hiccups were somewhat mysterious. However, I found that simply restarting A1111 often resolved the issue. Upon restarting, A1111 typically initiated installations related to its components, or it appeared that something I did had disrupted its functionality. In either scenario, a restart was the effective solution in my experience. |

Leave a Reply