How to Install Invoke Training for Stable Diffusion | 5 Easy to Understand Steps, Installation Guide
Learn how to install Invoke Training UI for Stable Diffusion. Installing Invoke Training requires a series of steps that I’ll break down into an easy-to-follow process. This guide is designed to help you get started with Invoke Training without needing to dive too deeply into technical details. Before we start, ensure you have a basic setup ready, which includes a computer with internet access and some familiarity with using command-line interfaces (CLI) like Terminal on macOS or Command Prompt on Windows.
Table of Contents
Step 1: Prerequisites
- Python Installation: Invoke Training runs on Python, so you’ll need Python installed on your computer. Most systems come with Python pre-installed, but if yours doesn’t, download and install Python from the official Python website. Choose the version recommended for your operating system.
- PIP (Python Package Installer): Ensure you have PIP installed, which comes bundled with Python installations. PIP allows you to install and manage Python packages easily.
For a complete prerequisites installation guide, please follow the link below to set everything up before moving forward.

This is the Stable Diffusion prerequisite guide. Here we will learn how to prepare your system for the installation of Stable Diffusion’s distinct Web UIs—Automatic1111, Invoke 3.0, and Comfy UI

In this tutorial, you will learn how to install Invoke for Stable Diffusion and how to use it to generate amazing images from your own prompts.
Step 2: Create an Installation Folder
To get started with Invoke Training efficiently and ensure smooth operation, it’s crucial to organize your workspace from the get-go. Given the substantial size of AI models, especially when dealing with training data and generated models, proper storage planning is key. Here’s a streamlined guide to setting up your workspace:
- Allocate Adequate Storage:
Select a Drive with Ample Space. AI model training involves handling large datasets and model files. Choose a drive on your computer or an external hard drive with sufficient storage capacity to accommodate these large files without running into space constraints. - Creating Your Workspace:
Navigate to the chosen drive and create a new folder specifically for your Invoke Training projects. This dedicated space will help you keep your training data, models, and related files organized and easily accessible. - Naming the Folder:
Name the folder something clear and descriptive, such as “Invoke_AI_Training” or simply “AI_Models_Training.” A straightforward name will help you locate your workspace quickly, especially if you’re managing multiple projects or datasets.- Example: D:\Invoke Training
- Example: D:\Invoke Training
Step 3: Download Invoke Training
- Clone the Github repository.
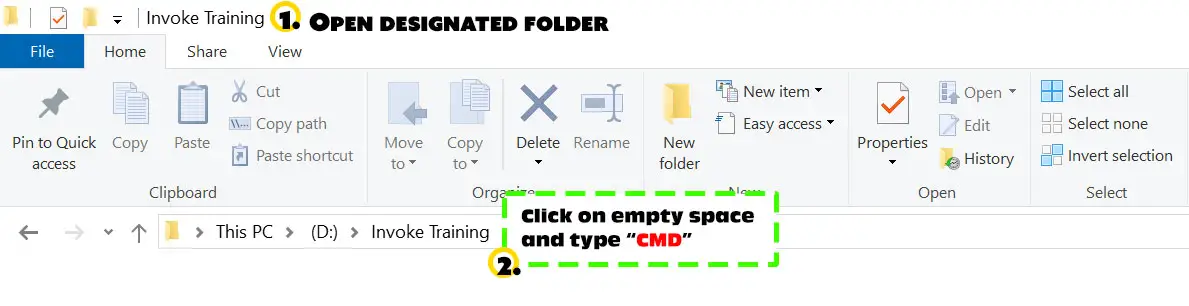
- Navigate to the directory where you’ve downloaded or cloned the Invoke Training files.
- To open the Command Prompt directly in this location, click on the address bar at the top of the file explorer window (where the folder path is displayed). Clear any text, type “cmd,” and press Enter.
- This action opens the Command Prompt window already set to the directory of your Invoke Training folder.
- In the Command Prompt window that appears, enter the following command to clone the Invoke Training repository:
- Copy and Paste this line in the command line:
git clone https://github.com/invoke-ai/invoke-training

Step 4: Install Invoke Training
- Navigate to the Downloaded Folder.
- After you’ve cloned the repository, you can copy and paste the lines below to install invoke-training and its dependencies.
python -m pip install –upgrade pip
pip install “.[test]” –extra-index-url https://download.pytorch.org/whl/cu121
Step 5: Launch Invoke Training
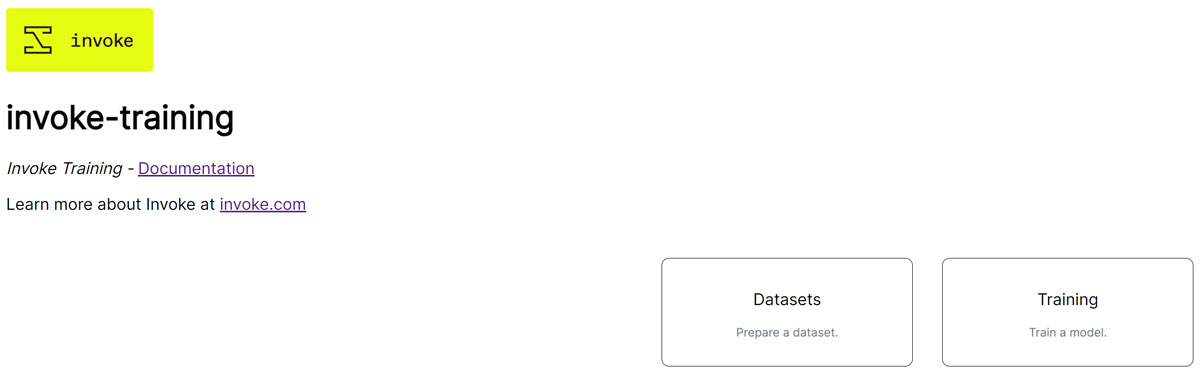
- Run training via the GUI for a simpler starting point.
- Open the Command Prompt directly from Invoke Trainer Installation Folder.
- Click on the address bar at the top of the file explorer window (where the folder path is displayed). Clear any text, type “cmd,” and press Enter.
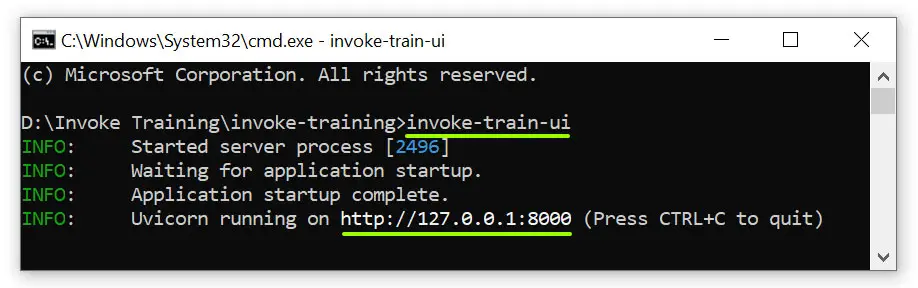
- Enter the command below in the command prompt window:
invoke-train-ui - Copy the URL provided in your command prompt that should look like the one highlighted in yellow below:
Uvicorn running on http://127.0.0.1:8000 (Press CTRL+C to quit)


Leave a Reply