Photography Exercises: Simple Ways to Keep Your Photography Skills Sharp
Are you looking for ways to improve your photography skills and keep your passion alive? You might want to familiarize yourself with some weekly photography exercises. Photography exercises are simple and fun activities that challenge you to use your camera in different ways and explore new aspects of photography. They can help you generate ideas, master the technical skills, and discover your own style.
In this post, we will show you some of the best photography exercises that you can do weekly to keep your photography skills sharp. Whether you are a beginner or a pro, a shooter or an editor, you will find something that suits your level and interest.
Table of Contents
Why Weekly Exercises are Important for Photographers
As photographers, we often have busy schedules and competing priorities that make it hard to find time and inspiration for our craft. We may feel stuck in a rut, bored with our subjects, or frustrated with our results. We may also lose touch with our passion and ideas, which are essential for producing great images. That’s why we need to make weekly exercises a part of our routine.
Weekly exercises are not only a way to practice and improve our skills, but also a way to explore and express ourselves through photography. They can help us:
Challenge ourselves:
Weekly exercises can push us out of our comfort zone and force us to try new things. They can expose us to different genres, techniques, and perspectives that we may not have considered before. They can also help us overcome our fears and limitations, such as shooting in low light, using manual mode, or approaching strangers.
Learn from others:
Weekly exercises can also be a great opportunity to learn from other photographers. We can join online communities, such as blogs, forums, or social media, where we can share our work, get feedback, and see how others approach the same exercise. We can also participate in local or online events, such as photo walks, workshops, or contests, where we can meet and network with other photographers.
Improved skills:
The most obvious benefit of weekly exercises is that they help you improve your skills. By regularly practicing and challenging yourself, you’ll be able to progress more quickly and become a stronger photographer.
Increased creativity:
Weekly exercises can also help increase your creativity. By setting specific goals and challenges, you’ll be forced to think outside the box and come up with new ideas. This can help break you out of a creative rut and keep your work fresh and interesting.
Enhanced problem-solving skills:
Photography is all about problem-solving. From finding the right angle to composing the perfect shot, photographers are constantly faced with challenges. Weekly exercises can help you develop your problem-solving skills by forcing you to come up with solutions to specific challenges.
Better time management:
Weekly exercises can also help improve your time management skills. By setting a specific goal and deadline, you’ll be forced to prioritize and manage your time effectively. This can be especially helpful for those who struggle with procrastination or finding the time to practice their craft.
Have fun:
Most importantly, weekly exercises can help us have fun and enjoy photography. They can remind us of why we love photography and what it means to us. They can also spark our curiosity and imagination, and inspire us to create images that reflect our personality and vision.
By doing weekly exercises, we can keep our photography skills sharp and our passion alive. We can also discover new possibilities and opportunities for our photography. So what are you waiting for? Grab your camera and start your weekly exercises today!
Photography Exercises: How Do you Get Started?
Set a specific goal for each week.
- One of the most important steps in incorporating weekly exercises into your routine is setting a specific goal for each week. This will help you focus your efforts and stay motivated. So, take some time to think about what skills you want to improve and set a clear goal for yourself.
- This could be something as specific as practicing your composition skills or as general as improving your lighting techniques. By setting a specific goal, you’ll have a clear target to work towards and be more likely to stick with your exercises. So, take the time to determine what skills you want to focus on and set a clear goal for yourself. This will help you stay motivated and make the most of your weekly exercises.
Get creative:
Don’t be afraid to get creative and have fun with your exercises. The more you enjoy them, the more likely you are to stick with them. Try setting a theme each week, such as “abstract” or “black and white,” and see what kind of images you can come up with. Or, challenge yourself to take a photo every day for a week using only your smartphone. The possibilities are endless!
Share your progress:
Share your progress and results with other photographers or in a photography group. This will not only help you stay accountable, but it will also give you the opportunity to get feedback and see how your work compares to others. You might even find some new friends or collaborators along the way!
Make it a habit:
The key to success with weekly exercises is to make them a regular part of your routine. Set aside a specific time each week to work on them, and stick to it. You might find it helpful to schedule your exercises on your calendar or set a reminder on your phone.
Keep track of your progress:
Make sure to keep track of your progress and results. This will help you see how far you’ve come and where you need to improve. You might even find that you have a whole portfolio of images at the end of a few months!
By incorporating weekly exercises into your routine, you’ll be amazed at how quickly your skills improve. So, don’t be afraid to get creative and have fun with them. Happy shooting!
How to Do These Exercises
These exercises are designed to help you practice and improve your photography skills in a fun and engaging way. You can do them at your own pace, whenever and wherever you want. You can also adapt them to your own preferences and goals. Here are some tips on how to do these exercises:
Set a schedule:
To get the most out of these exercises, you should try to do them regularly and consistently. You can set a schedule that works for you, such as once a week, once a month, or whenever you have some free time. You can also use a calendar or a reminder app to keep track of your progress and motivate yourself.
Choose a theme:
To make these exercises more interesting and challenging, you can choose a theme for each session. A theme can be anything that inspires you, such as a color, a word, a genre, or a mood. You can also use a random theme generator to get some ideas or use Midjourney to get ideas. A theme can help you focus your attention and creativity on a specific topic or concept.
Experiment and explore:
The best way to learn and improve your photography is to experiment and explore different possibilities and techniques. Don’t be afraid to try new things, make mistakes, and learn from them. You can also use different tools and resources, such as online tutorials, books, or courses, to expand your knowledge and skills. You can also use different software, such as Photoshop, Lightroom, or GIMP, to edit your photos and enhance them.
Share and get feedback:
- One of the most rewarding aspects of photography is sharing your work and getting feedback from others. You can share your photos with your friends, family, or online communities, such as blogs, forums, or social media. You can also join or create a Discord server, where you can chat, hang out, and have fun with other photographers.
- Discord is a free communication platform that allows text, voice, video and screen sharing chats. You can join a Discord server in several ways, including clicking invite links, manually joining a server via the Add a Server button, and using Server Discovery. You can also create your own server and invite people to join. To learn more about how to use Discord, you can check out this beginner’s guide or watch this video.
If you are interested in joining a Discord server for photography enthusiasts, you can join our server by clicking this link9. You will find a friendly and supportive community of photographers of all levels and backgrounds. You can share your photos, get feedback, ask questions, participate in challenges, and make new friends. We would love to see you there!
Ideas to Get You Going
And if you’re still feeling stuck and not sure where to start, here are a few ideas for weekly exercises to get you going:
- Take one photo every day for a week using only your smartphone.
- Experiment with different lighting setups for one week.
- Create a series of images based on a specific theme, such as “abstract” or “black and white.”
- Practice shooting in manual mode for one week.
- Try a new genre of photography, such as portrait, landscape, or still life.
Remember, the key is to make your weekly exercises fun and engaging. So, get creative and have fun with them! Happy shooting!
Creative Exercises
One of the best ways to improve your photography is to challenge your creativity. Creative exercises force you to think outside the box and use your imagination. They can also help you discover new techniques and perspectives that you might not have tried before. Here are some examples of creative exercises that you can do weekly:
Shoot a single subject from different angles:
Pick a subject that interests you and try to capture it from various angles and distances. You can use different lenses, zoom in or out, or move around the subject. The goal is to create different compositions and moods with the same subject.
Use only one lens:
Limit yourself to using only one lens for a week. This will make you more aware of the strengths and weaknesses of your lens and how it affects your images. You will also have to adapt to different situations and find creative solutions to overcome the limitations of your lens.
Create abstract images:
Try to create images that are not easily recognizable or have a hidden meaning. You can use macro photography, blur, motion, or other effects to create abstract images. You can also look for patterns, shapes, colors, or textures that catch your eye and use them as your subject.
Technical Exercises
Another way to improve your photography is to master the technical skills. Technical exercises help you understand how your camera works and how to control the exposure, focus, aperture, shutter speed, and ISO. They also help you experiment with different lighting conditions and effects. Here are some examples of technical exercises that you can do weekly:
Shoot in manual mode:
Manual mode gives you full control over your camera settings and allows you to adjust them according to your needs and preferences. Shooting in manual mode will make you more confident and knowledgeable about your camera and how to achieve the desired results. You can start by learning the exposure triangle and how to balance the aperture, shutter speed, and ISO.
Use different metering modes: .
Metering modes are the methods that your camera uses to measure the light and determine the correct exposure. Different metering modes have different advantages and disadvantages depending on the situation and the subject. You can try using different metering modes, such as matrix, center-weighted, or spot, and see how they affect your images
Experiment with different lighting conditions:
Lighting is one of the most important factors in photography, as it can create different moods, colors, and contrasts. You can experiment with different lighting conditions, such as natural or artificial, direct or diffused, hard or soft, and warm or cool. You can also use reflectors, diffusers, or filters to modify the light and create different effects.
Composition Exercises
A third way to improve your photography is to improve the composition of your images. Composition is the arrangement of elements in your image that creates a visual impact and balance. Composition exercises help you learn the basic rules and principles of composition, such as the rule of thirds, leading lines, negative space, or symmetry. They also help you break the rules and find your own style. Here are some examples of composition exercises that you can do weekly:
Use the rule of thirds:
The rule of thirds is a guideline that divides your image into nine equal parts using two horizontal and two vertical lines. The idea is to place the most important elements of your image along these lines or at their intersections. This creates a more dynamic and balanced composition than placing them in the center.
Use leading lines:
Leading lines are lines that guide the viewer’s eye towards the main subject or point of interest in your image. They can be natural or artificial, such as roads, rivers, fences, or buildings. They can also create a sense of depth, perspective, and movement in your image.
Use negative space:
Negative space is the empty or unoccupied space around your subject. It can help you create a minimalist and elegant composition that draws attention to your subject. It can also create a sense of contrast, isolation, or calmness in your image.
Learn more about compositional ideas:

Learn the power of composition in storytelling photography. Learn how to arrange elements to create visual narratives that captivate and connect.
Genre-specific Exercises
A fourth way to improve your photography is to practice a specific genre or style of photography that interests you. Genre-specific exercises help you learn the characteristics, techniques, and challenges of different types of photography, such as portrait, landscape, street, or macro. They also help you develop your own niche and voice as a photographer. Here are some examples of genre-specific exercises that you can do weekly:
Shoot portraits with natural light:
Natural light is one of the best sources of light for portrait photography, as it can create flattering and natural-looking images. You can try shooting portraits with natural light in different times of the day, such as golden hour, blue hour, or midday. You can also use different types of natural light, such as direct, diffused, or reflected.
Capture landscapes with a wide-angle lens:
A wide-angle lens is a great tool for landscape photography, as it can capture a large field of view and create a sense of depth and scale. You can try capturing landscapes with a wide-angle lens in different locations, such as mountains, forests, or beaches. You can also use different techniques, such as foreground interest, leading lines, or panoramas.
Find interesting details in everyday objects:
Macro photography is the art of capturing small and often overlooked details in everyday objects, such as flowers, insects, or jewelry. You can try finding interesting details in everyday objects with a macro lens or a close-up filter. You can also use different settings, such as aperture, focus, or background, to create different effects.
Color Specific Exercises
One of the best ways to improve your color photography is to learn how to use the color wheel and the color theory. The color wheel is a tool that shows the relationships between different colors, such as complementary, analogous, triadic, or monochromatic. The color theory is a set of principles and guidelines that help you understand how colors affect each other and the viewer. Here are some examples of color specific exercises that you can do weekly:
Use complementary colors:
Complementary colors are opposite each other on the color wheel, such as red and green, yellow and purple, or blue and orange. When used together, they create a strong contrast and a high impact. You can try to find or create scenes that have complementary colors and photograph them. You can also use filters or editing tools to enhance the complementary colors in your images.
Use analogous colors:
Analogous colors are next to each other on the color wheel, such as red, orange, and yellow, or green, blue, and purple. When used together, they create a harmonious and pleasing effect. You can try to find or create scenes that have analogous colors and photograph them. You can also use white balance or editing tools to adjust the color temperature in your images.
Use triadic colors:
Triadic colors are three colors that are evenly spaced on the color wheel, such as red, yellow, and blue, or green, orange, and purple. When used together, they create a balanced and vibrant effect. You can try to find or create scenes that have triadic colors and photograph them. You can also use exposure or editing tools to adjust the brightness and saturation in your images.
Use monochromatic colors:
Monochromatic colors are shades of the same color, such as light blue, medium blue, and dark blue, or pink, magenta, and fuchsia. When used together, they create a subtle and elegant effect. You can try to find or create scenes that have monochromatic colors and photograph them. You can also use aperture or editing tools to adjust the depth of field and focus in your images.
These are some examples of color specific exercises that you can do weekly to improve your color photography skills. By doing these exercises, you will learn how to use color more effectively and creatively in your images. You will also develop your own color style and preferences. If you have any questions or feedback, please let me know.
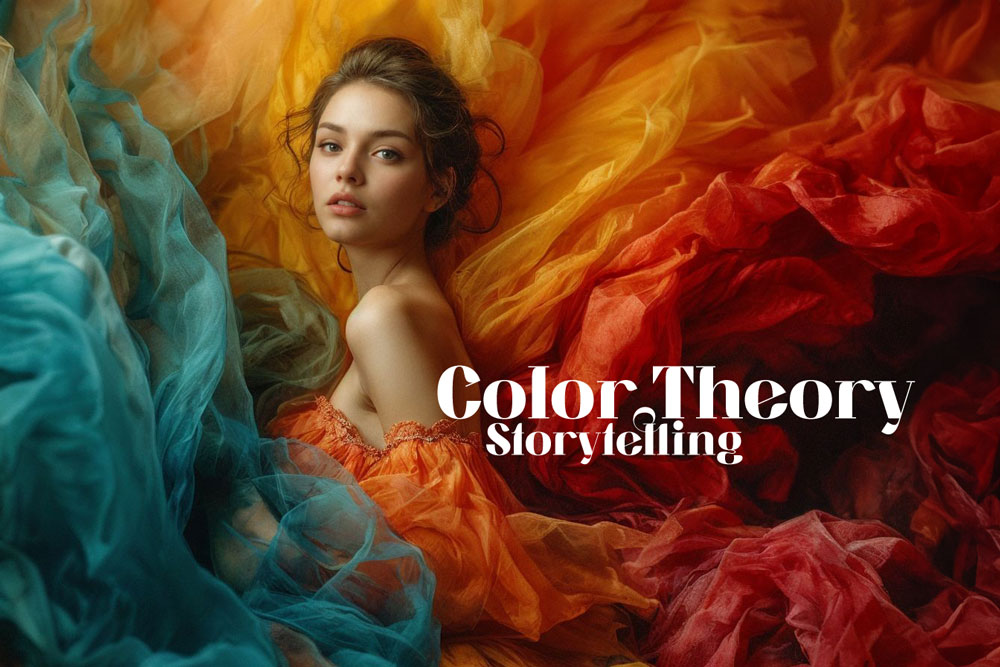
Master the art and science of color theory in storytelling photography. Learn how to evoke emotions and create captivating images with Photography Color Theory.
Editing Exercises
One of the best ways to improve your editing skills is to practice on different types of photos and see how you can change their look and feel with various tools and adjustments. Editing exercises can help you learn how to use different software, such as Photoshop, Lightroom, or GIMP, and how to apply different effects, such as filters, presets, or overlays. On this site, I edit a lot and now I use AI tools almost all the time so I practice those a lot. Here are some examples of editing exercises that you can do weekly:
Edit other people’s photos:
A good way to learn from other photographers is to edit their photos and see how you can improve them or give them a different style. You can find free raw photos for editing online or ask your friends or family for permission to use their photos. You can also compare your edits with the original photos or the edits done by the original photographers.
Edit a photo five different ways:
A fun way to challenge your creativity and explore different possibilities is to edit a single photo in five different ways. You can use different software, tools, or adjustments to create different versions of the same photo. You can also try different genres or styles, such as black and white, vintage, or HDR.
Edit a photo to match a mood or theme:
A useful way to practice your storytelling and communication skills is to edit a photo to match a mood or theme. You can use different colors, tones, or contrasts to create different emotions or atmospheres in your photo. You can also use different elements, such as text, graphics, or borders, to create different messages or contexts in your photo.
These are some examples of editing exercises that you can do weekly to improve your editing skills. By doing these exercises, you will learn how to use editing more effectively and creatively in your photography. You will also develop your own editing style and preferences. If you have any questions or feedback, please let me know.
Midjourney for Photography Inspiration
One of the most exciting and innovative ways to improve your photography is to use Midjourney. Midjourney is an AI tool that can create stunning images from your text descriptions. You can use Midjourney to generate photography ideas, experiment with different genres and styles, and discover new possibilities and opportunities for your photography. Here are some examples of how you can use Midjourney for photography:
Generate photography ideas:
If you are stuck for inspiration or want to try something new, you can use Midjourney to generate photography ideas. You can use natural language to describe the scene, subject, mood, or style that you want to create. You can also use modifiers, such as –ar, –style, or –stylize, to adjust the aspect ratio, realism, or aesthetics of the image. Midjourney will then generate an image that matches your prompt, or several images if you use the Remix mode. You can use these images as a starting point for your own photography, or as a reference for your preproduction.
Experiment with different genres and styles:
If you want to expand your horizons and learn new skills, you can use Midjourney to experiment with different genres and styles of photography. You can use Midjourney to generate images of landscapes, portraits, nature, architecture, fashion, abstract, and more. You can also use Midjourney to generate images in the style of your favorite photographers, such as Annie Leibovitz, Gregory Crewdson, or Anton Corbijn. You can use these images to study the characteristics, techniques, and challenges of different types of photography, and to develop your own niche and voice as a photographer.
Discover new possibilities and opportunities:
If you want to push your creativity and explore new domains, you can use Midjourney to discover new possibilities and opportunities for your photography. You can use Midjourney to generate images that are not easily achievable or realistic in real life, such as fantasy, sci-fi, or surreal scenes. You can also use Midjourney to generate images that are not easily recognizable or have a hidden meaning, such as abstract or conceptual images. You can use these images to spark your curiosity and imagination, and to create images that reflect your personality and vision.
By using Midjourney, you can improve your photography skills and keep your passion alive. You can also find new sources of inspiration and expression for your photography.

Boggers find themselves tangled in the web of licensing, copyrights, and usage permissions, particularly when it comes to premium image platforms like Midjourney. So, can you use Midjourney images on your blog?
How to Analyze and Break Down Images
One of the best ways to learn from the images generated by Midjourney is to analyze and break down their components and techniques. By doing this, you can understand how the images were created and what you can do to replicate or improve them. You can also identify what’s doable in camera and what’s only doable in editing. Here are some steps on how to analyze and break down images:
Identify the main subject and the background:
The first step is to identify the main subject and the background of the image. The main subject is the focal point or the main element that draws the viewer’s attention. The background is the area behind or around the main subject that provides context or contrast. You can ask yourself: What is the main subject of the image? How is it positioned, framed, or isolated? What is the background of the image? How does it relate to the main subject? Is it blurred, detailed, or textured?
Identify the light source and the direction:
The next step is to identify the light source and the direction of the image. The light source is the origin of the light that illuminates the scene. The direction is the angle or the position of the light relative to the main subject and the camera. You can ask yourself: What is the light source of the image? Is it natural or artificial, direct or diffused, hard or soft, or warm or cool? What is the direction of the light? Is it front, back, side, or top lighting? How does it affect the shadows, highlights, and colors of the image?
Identify the camera settings and the lens:
The third step is to identify the camera settings and the lens of the image. The camera settings are the parameters that control the exposure, focus, and motion of the image. The lens is the optical device that captures the image and affects the perspective, distortion, and depth of field of the image. You can ask yourself: What are the camera settings of the image? What is the aperture, shutter speed, and ISO? How do they affect the brightness, sharpness, and noise of the image? What is the lens of the image? What is the focal length, angle of view, and aperture range? How do they affect the magnification, distortion, and bokeh of the image?
Identify the editing tools and the adjustments:
The final step is to identify the editing tools and the adjustments of the image. The editing tools are the software or applications that are used to modify or enhance the image. The adjustments are the changes or effects that are applied to the image. You can ask yourself: What are the editing tools of the image? What software or applications were used to create or edit the image? What are the adjustments of the image? What filters, presets, or overlays were used to change the colors, tones, or contrasts of the image? What tools, such as cropping, cloning, or healing, were used to change the shape, size, or content of the image?
By following these steps, you can analyze and break down the images generated by Midjourney and learn how to create similar or better images with your photography. You can also determine what’s doable in camera and what’s only doable in editing. For example, you can see if the image has realistic or unrealistic colors, shapes, or elements, and if they were achieved by using the camera settings, the lens, or the editing tools. You can also compare your own images with the images generated by Midjourney and see how you can improve them. If you have any questions or feedback, please let me know.
In the last year, I have been exploring how AI tools can enhance my photography workflow. I have been using Stable Diffusion, Midjourney, Skylum, Photoshop Generative AI and other tools to create, edit, and refine my images. I see a future where these tools will enable me to transform my images into animated films with technologies like Stable Video Diffusion and Boximator.
This will open up new possibilities and challenges for photography, but I also believe that photography will always have a place for authentic images and relationships. AI generators can produce beautiful art, but they cannot capture the essence of photography. That’s why I want to experiment with new photography genres and incorporate them into my work. I invite you to join me in my DangerGirl community, where we can share our work and grow together in this genre. Join me in my DangerGirl discord and let’s connect.
Conclusion
Photography is a skill that requires constant practice and improvement. By doing weekly exercises, you can keep your photography skills sharp and your passion alive. You can also discover new techniques, styles, and possibilities for your photography. In this post, we showed you some of the best photography exercises that you can do weekly, covering creative, technical, composition, genre-specific, color, and editing aspects. We also explained why weekly exercises are important for photographers, how to do them, and how to use Midjourney to generate amazing images from your text descriptions.
We hope you found these ideas helpful and inspiring. If you have any questions or feedback, please let us know in the comments below. And don’t forget to join our DangerGirl discord server, where you can share your work, get feedback, and make new friends. Happy shooting!


Leave a Reply